20+ Years Experience
Specialist Resin Flooring Installers
Enquire Today For A Free No Obligation Quote
Resin flooring is a type of flooring that uses a combination of resin and hardening agents to create a durable and long-lasting surface. It is commonly used in commercial and industrial settings due to its resistance to chemicals, abrasion, and impact. However, there might be instances when you would need to remove resin flooring, whether it’s to update the look of the space or to address issues with the existing flooring.
In this step-by-step guide, we will walk you through the process of removing resin flooring. But before we delve into that, let’s first understand what resin flooring is and why you would want to remove it.
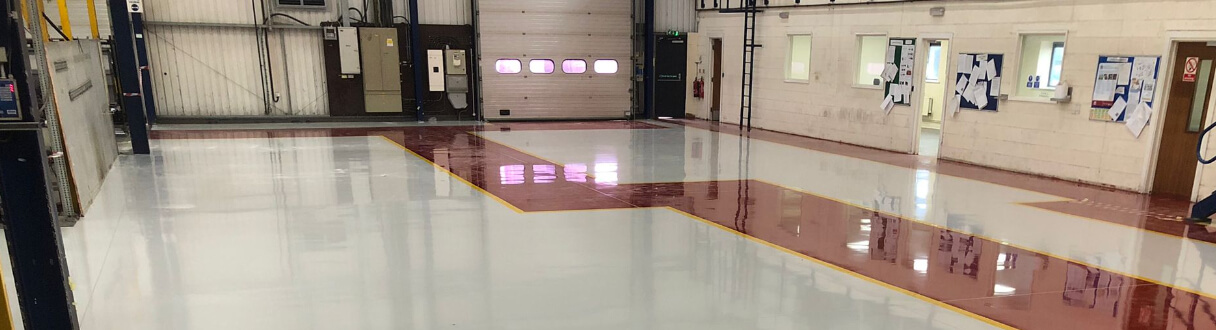
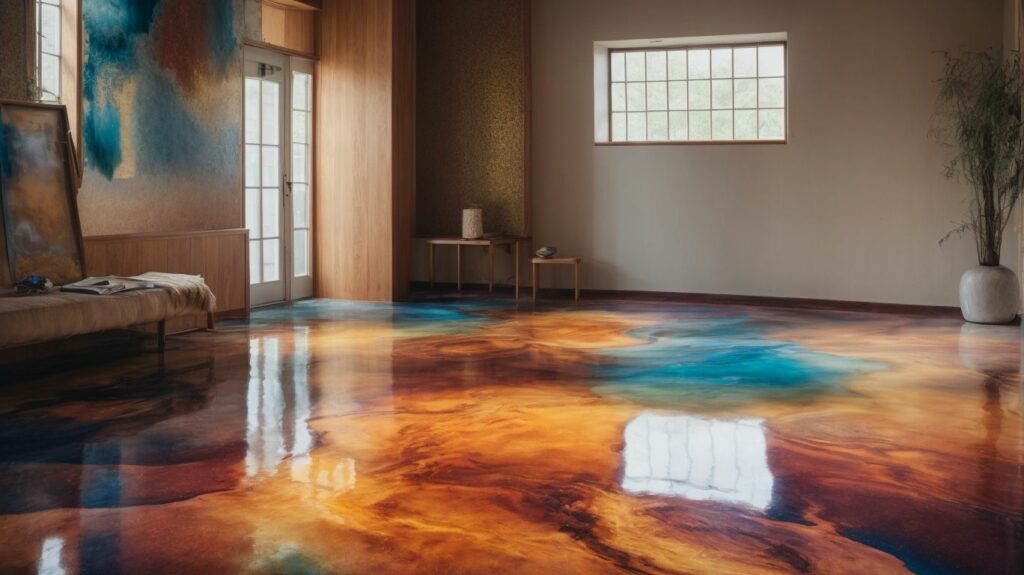
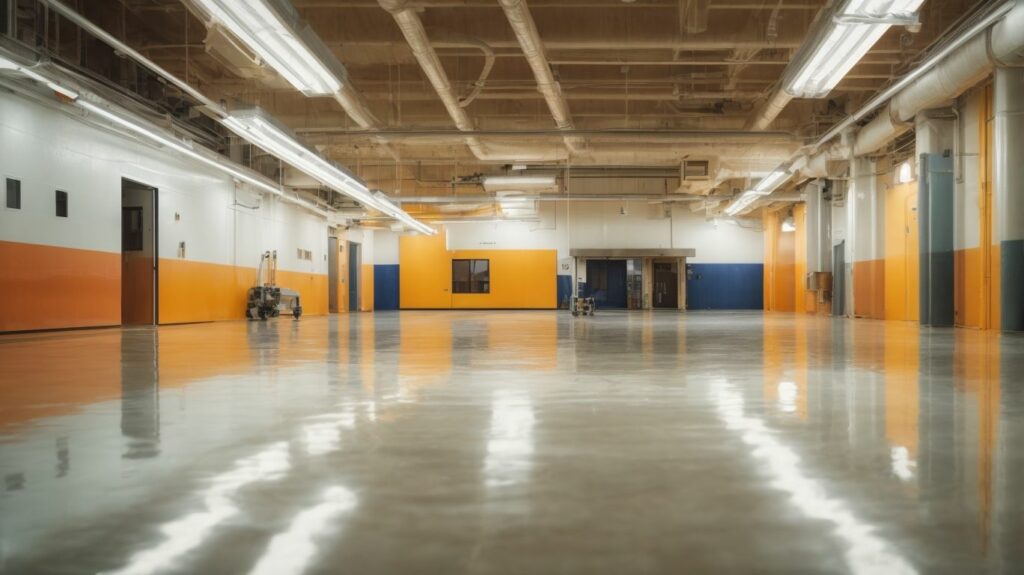
Resin flooring is a seamless and smooth flooring option that provides a high-gloss finish. It is commonly used in areas where a hygienic and easy-to-maintain surface is required, such as industrial kitchens, hospitals, and warehouses.
There are various reasons why you might want to remove resin flooring. It could be due to wear and tear over time, the need for a different flooring material, or the presence of damage or defects that require repair. Whatever the reason may be, it is important to follow a systematic approach to ensure a successful removal process.
Stay tuned as we guide you through each step of the process, from preparation and safety precautions to the actual removal of the resin flooring. We will also address common challenges that may arise during the process and provide tips on when it’s best to seek professional help. We will share some preventative measures to help you avoid the need to remove resin flooring in the future. So let’s get started on this journey of undoing and redoing your flooring.
Resin flooring is a type of flooring made from a combination of resin and hardener. It is popular in industrial and commercial spaces because it is durable and resistant to chemicals, impacts, and abrasions. Resin flooring is also known for its seamless and easy-to-clean surface, making it hygienic and suitable for areas with high foot traffic. It can be customized with different colours and finishes to match the aesthetic of the space. Resin flooring is a versatile and reliable option for various applications.
One might want to remove resin flooring for various reasons. If the existing flooring has become damaged or worn out, it may be necessary to remove the resin coating for repairs or replacement. Changing design preferences or functional requirements may also require the removal of resin flooring to accommodate a different style or type of flooring. In some cases, the resin flooring may not have been applied correctly or may have developed issues over time, prompting the need for removal. For example, a homeowner decided to remove their resin flooring after discovering cracks and delamination caused by improper installation.
In this guide, we will provide a step-by-step approach to removing resin flooring. From safety precautions to necessary tools and equipment, we will cover everything you need to know. We will also help you evaluate the situation and create a solid plan. Additionally, we will guide you through the removal process and proper disposal of resin waste. Let’s get started!
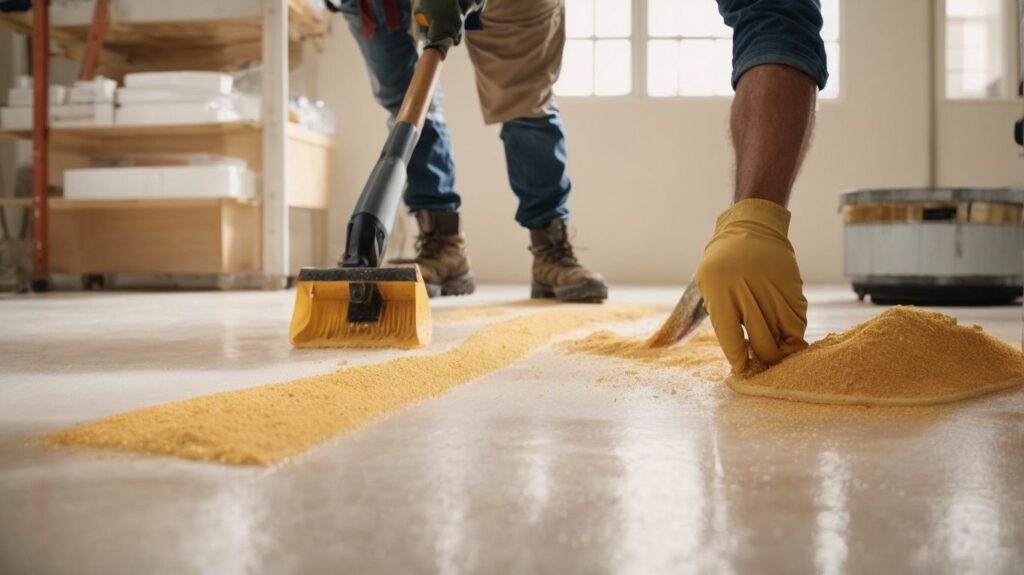
Prior to removing resin flooring, it is important to prepare the area properly. This involves following the steps below:
By diligently preparing the area and gathering the appropriate tools, you can effectively initiate the process of removing resin flooring.
Taking appropriate safety precautions is essential when removing resin flooring. To ensure a safe process, follow these steps:
Wear protective clothing: Put on gloves, goggles, and a respirator to shield your skin, eyes, and lungs from harmful chemicals.
Ventilate the area: Open windows and use fans to guarantee proper ventilation and reduce exposure to fumes.
Prepare a safe work area: Remove any obstacles or tripping hazards from the space to prevent accidents.
Use the correct tools: Utilise tools specifically designed for resin flooring removal, such as scrapers and grinders, to avoid injuries.
Dispose of waste correctly: Seal and label bags containing removed resin waste, and adhere to local regulations for disposing of hazardous materials.
Step 3: Tools and equipment for removing resin flooring are vital for a smooth and successful process. You will need the following essential items:
With the correct tools and equipment, you can efficiently remove resin flooring and prepare the surface for any desired changes. Remember to always follow safety precautions and consult professionals if necessary.
When removing resin flooring, step 4 involves evaluating and planning to ensure a smooth and efficient process. Here are the key steps to follow:
By carefully evaluating and planning the removal process, you can minimize any potential issues and ensure the successful removal of the resin flooring. Remember to prioritize safety and follow proper disposal guidelines for any waste generated.
The removal process of resin flooring involves several important steps to ensure its effective removal.
Prepare the area by clearing out any furniture or obstacles.
Take necessary safety precautions such as wearing protective gear and ensuring proper ventilation.
Gather the required tools and equipment, including a scraper, heat gun, and solvent.
Evaluate the flooring and plan the removal process accordingly.
Start the removal process by first removing the top layer of the resin flooring.
Continue by removing the base layer using a scraper or heat gun.
Thoroughly clean the surface once the resin flooring has been removed.
Dispose of the resin waste properly in accordance with local regulations.
Proper disposal of resin waste is crucial to minimize environmental impact and comply with regulations. To ensure proper disposal of resin waste, follow these steps:
True story: A manufacturing company once mistakenly disposed of resin waste in regular trash bins, resulting in environmental contamination and costly fines. As a result of this incident, the company implemented proper disposal procedures to prevent future occurrences and ensure compliance.
Removing resin flooring can present several challenges that need to be overcome for a successful project. Here are some common challenges one may encounter:
To overcome these challenges, it is recommended to consult with professionals experienced in resin flooring removal. They can provide guidance, use proper tools and techniques, and ensure the safety and efficiency of the removal process.
When to Seek Professional Help?
Knowing when to seek professional help is crucial when dealing with the removal of resin flooring. Some DIY enthusiasts may attempt the process themselves, but there are certain circumstances where it is best to rely on the expertise of professionals. These circumstances include:
| 1. Extensive damage: | If the resin flooring is severely damaged or has deep stains that cannot be easily removed, it is advisable to consult professionals. |
|---|---|
| 2. Lack of experience: | If you have little or no experience in handling resin flooring, it is safer to call in professionals who have the necessary skills and knowledge. |
| 3. Time constraints: | If you have limited time available or cannot dedicate sufficient time to the removal process, professionals can complete the job efficiently and in a timely manner. |
| 4. Safety concerns: | The removal of resin flooring can involve the use of chemicals and specialized equipment. If you are unsure about handling these safely, it is best to leave it to professionals who have the proper tools and training. |
Remember, seeking professional help ensures a smooth and successful removal process, reducing the risk of mistakes or further damage.
Regularly clean your resin flooring to prevent the build-up of dirt and debris.
Follow the manufacturer’s guidelines for maintenance, including routine inspections and repairs.
Place protective mats in high-traffic areas to minimise wear and tear on the flooring.
Use gentle cleaning products that are specifically designed for use on resin flooring.
Install moisture barriers and ensure proper ventilation to prevent moisture-related damage.
By following these tips, you can prolong the lifespan of your resin flooring and avoid the hassle of having to remove and replace it.
Epoxy flooring is a type of resin flooring that is known for its supreme strength and long-lasting effects. It is commonly used in DIY projects and is considered one of the strongest glues available for various applications.
There are two main methods to remove epoxy flooring from a concrete slab. One option is to use a stripping solution, which involves applying a specific solution, letting it soak, and then scraping away the old epoxy. The other option is to use a light floor sander or shot blaster to strip away the epoxy layer.
To remove epoxy flooring, you may need tools such as a metal scraper, rubber gloves, an eye protection, a painter’s mask, a fiber mop, a shop vac, and potentially a light floor sander or shot blaster, depending on the method chosen.
Yes, it is possible to chemically remove epoxy from concrete floors. One method involves using a stripping solution, as mentioned earlier, which can effectively break down the epoxy layer for easier removal.
Yes, removing epoxy flooring can be a labor-intensive and time-consuming process, especially if it covers a large area. It requires careful preparation, patience, and the use of appropriate tools and equipment.
If you prefer not to remove epoxy flooring yourself, you can seek professional help from companies like Epoxy Colorado. They have expertise in applying, repairing, and replacing epoxy flooring and offer free estimates for assistance on the Colorado Front Range.
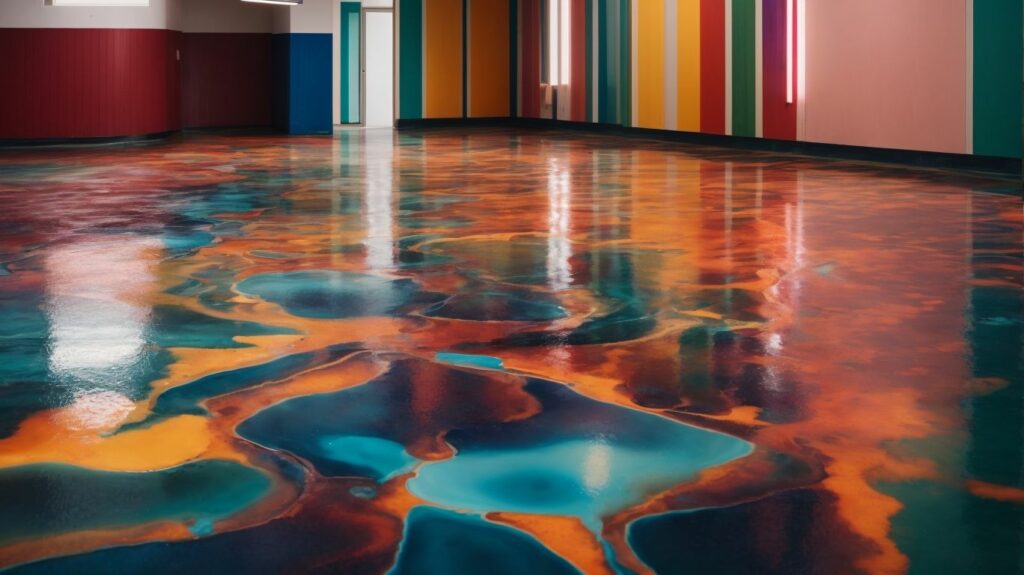


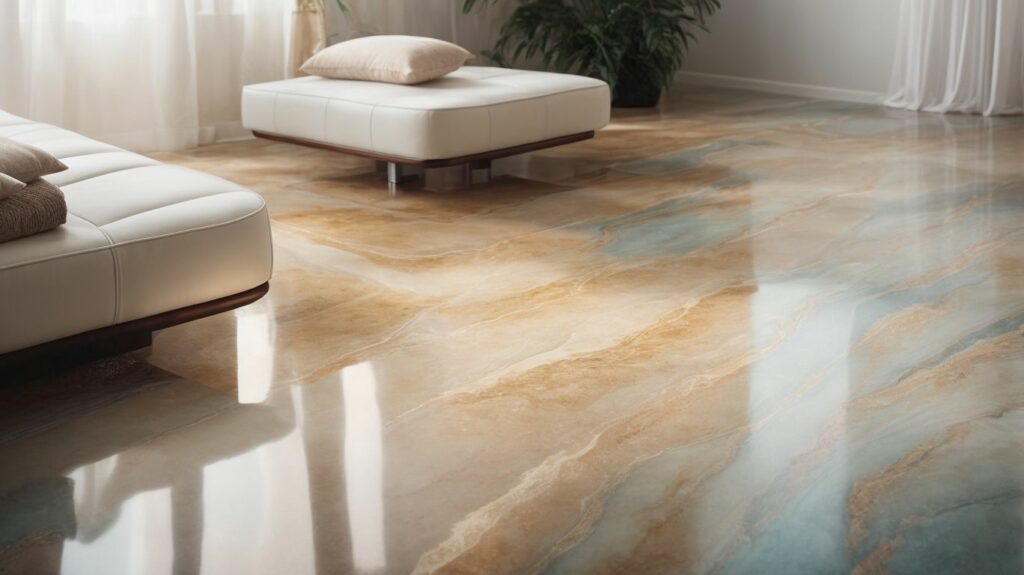
Colour Your World: Exploring the Vibrant Palette of Epoxy Floors
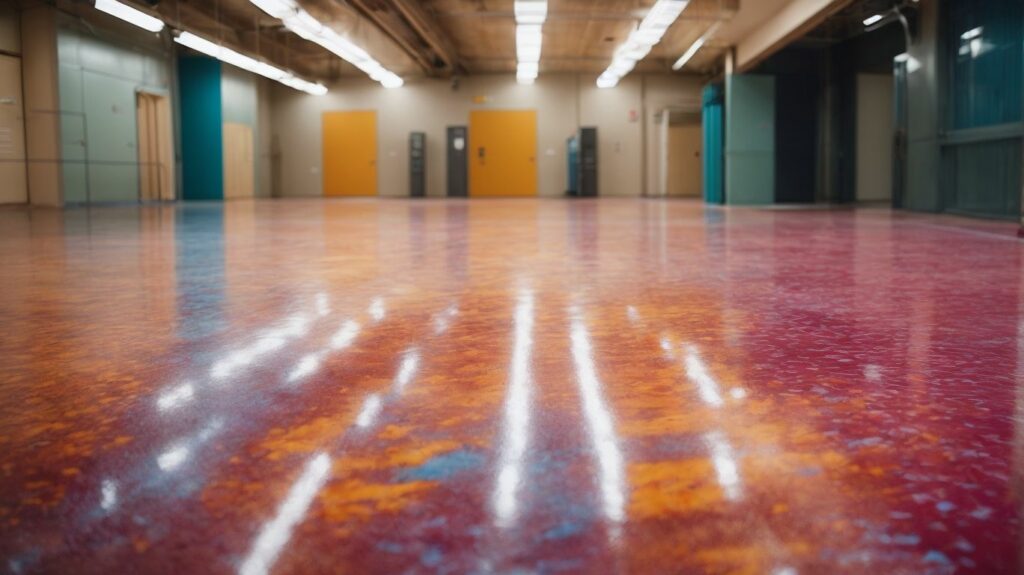
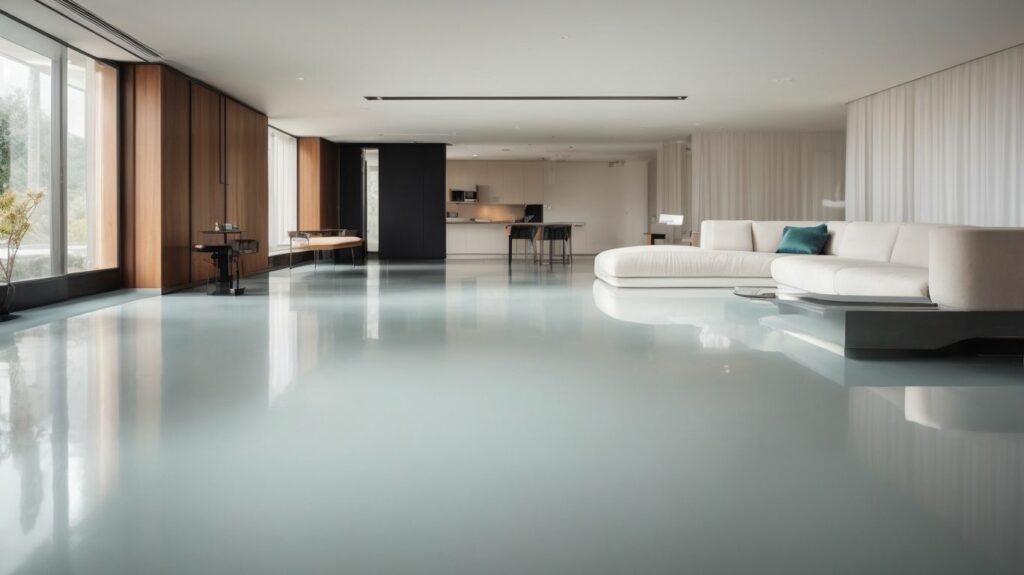
Epoxy floors are an incredibly versatile flooring option that offers a wide range of benefits for various spaces. Whether it’s a residential, commercial, or industrial setting, epoxy floors can transform the look and function of any space.
In residential spaces, epoxy flooring provides durable, easy-to-clean surfaces that are perfect for high-traffic areas like kitchens and bathrooms. In commercial spaces, epoxy floors offer a professional and sleek look that is ideal for offices, retail shops, and showrooms. In industrial environments, epoxy floors provide exceptional durability and resistance to chemicals, making them suitable for warehouses, factories, and manufacturing facilities.
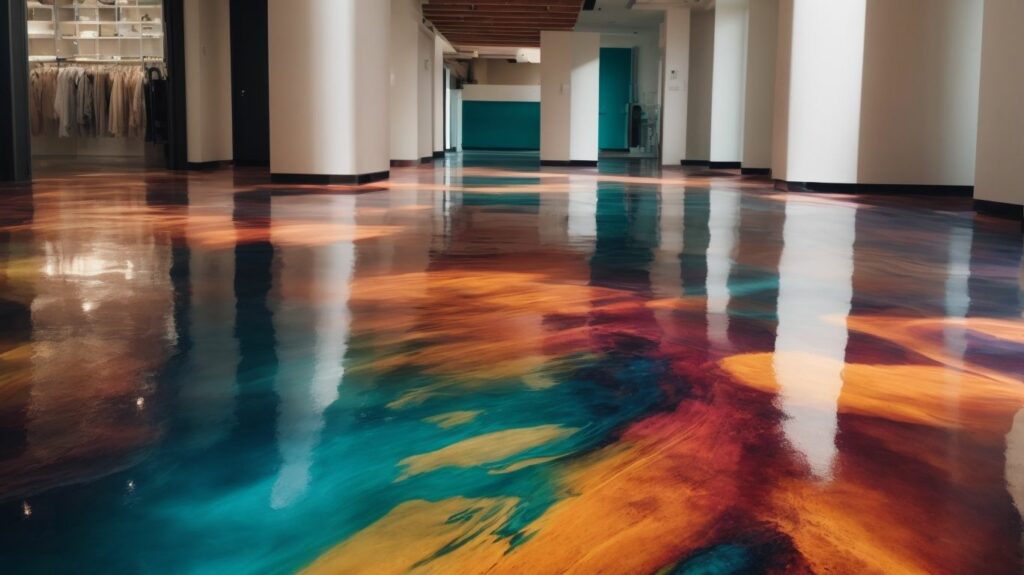
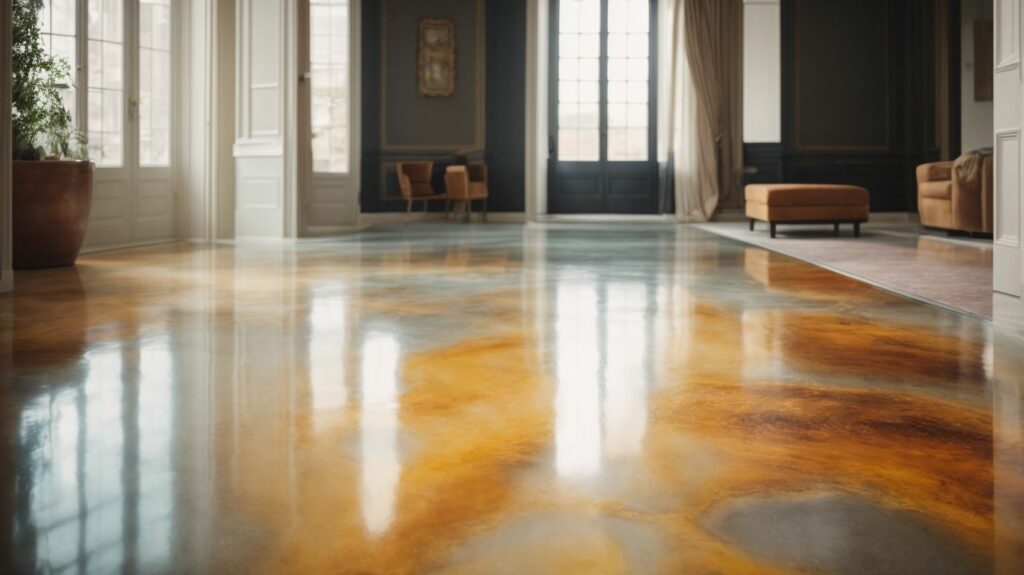
Aside from the practical advantages, epoxy floors also come in a vibrant palette of colours, allowing for endless design possibilities. Exploring various colours of epoxy floors enables you to create a space that reflects your personal style or fits perfectly with your brand identity. Mixing and matching colours can result in unique designs, while creating patterns and designs with epoxy floors allows for even more creative expression.
The design applications of epoxy floors are vast. In homes, epoxy floors enhance the aesthetic appeal, providing a modern and polished look. In commercial spaces, they create a professional ambiance that leaves a lasting impression on clients and customers. In industrial environments, epoxy floors not only enhance safety but also improve functionality and efficiency.
However, when choosing epoxy floor colours, certain factors should be considered. Space and size play a crucial role in determining the right colour scheme, as different colours can visually impact the perception of space. Lighting and ambience should also be taken into account, as certain colours may appear differently under various lighting conditions. The overall design and theme of the space should guide the selection of epoxy floor colours to ensure a cohesive and visually pleasing result.
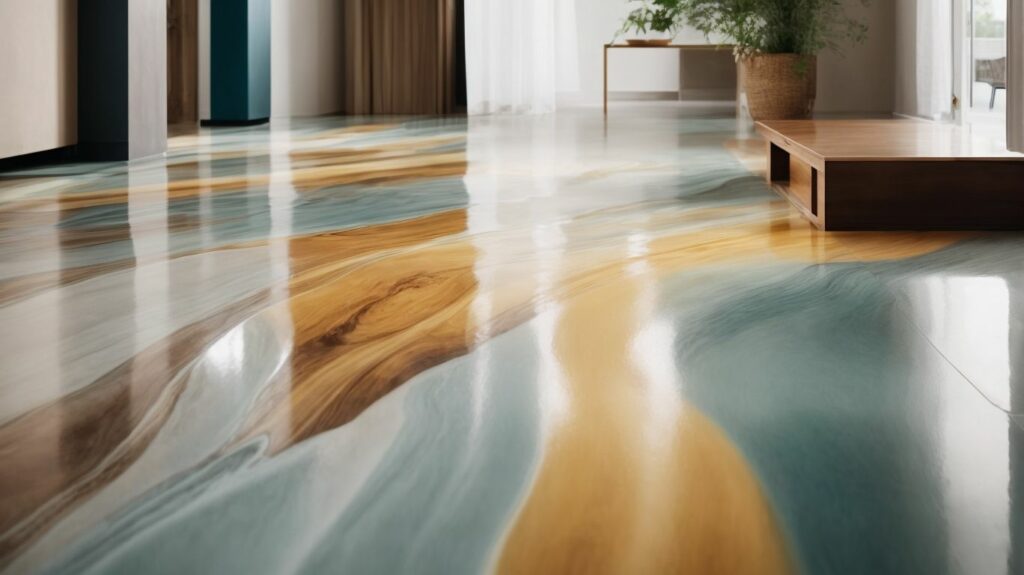
Epoxy floors offer versatile solutions for various spaces. Whether it’s residential, commercial, or industrial, epoxy flooring brings a vibrant palette to enhance the aesthetics and durability. Discover how epoxy floors can transform your living space into a modern haven, elevate your business setting with a polished and professional look, or provide the perfect foundation for heavy-duty industrial operations. Let’s explore the endless possibilities of epoxy flooring!
Epoxy flooring for residential spaces offers durability, easy maintenance, and a wide range of design possibilities. It is a versatile option that provides enhanced durability, easy cleaning, and design flexibility.
Pro-tip: Consider choosing a matte or satin finish for residential spaces to create a more natural and warm aesthetic.
Epoxy flooring is a versatile option for commercial spaces, offering durability, easy maintenance, and a professional appearance.
Epoxy flooring is highly versatile and can be used in various industries. In this section, we will discuss the benefits and considerations of using epoxy flooring in industrial spaces.
When choosing epoxy flooring for industrial spaces, it is important to consider the specific requirements of your industry and consult with flooring professionals to ensure you select the right type and thickness of epoxy coating.
Epoxy floors offer many benefits that make them a popular choice for both commercial and residential spaces.
Fact: Epoxy floors are also used in industrial settings due to their ability to withstand extreme temperatures and resist impact.
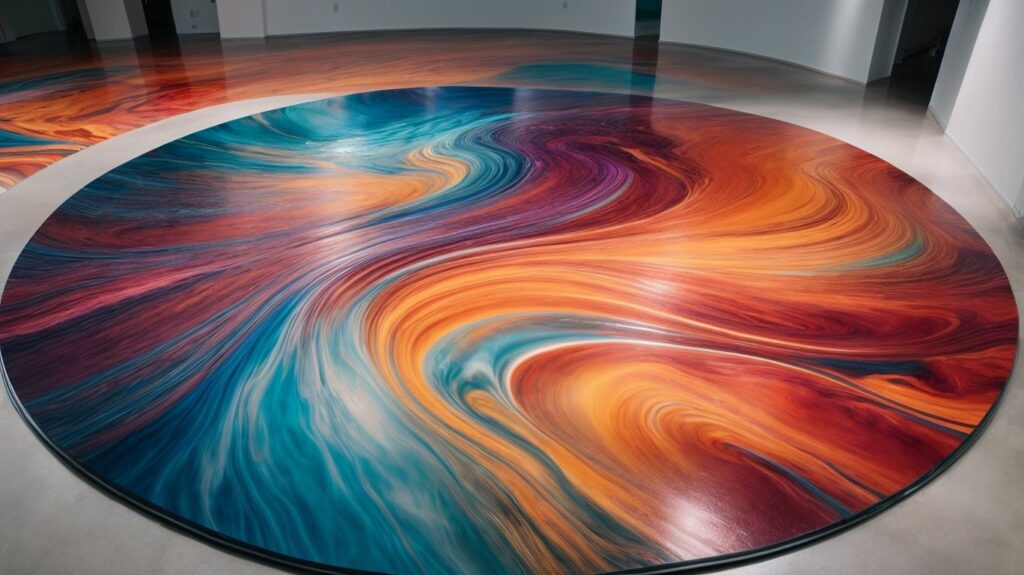
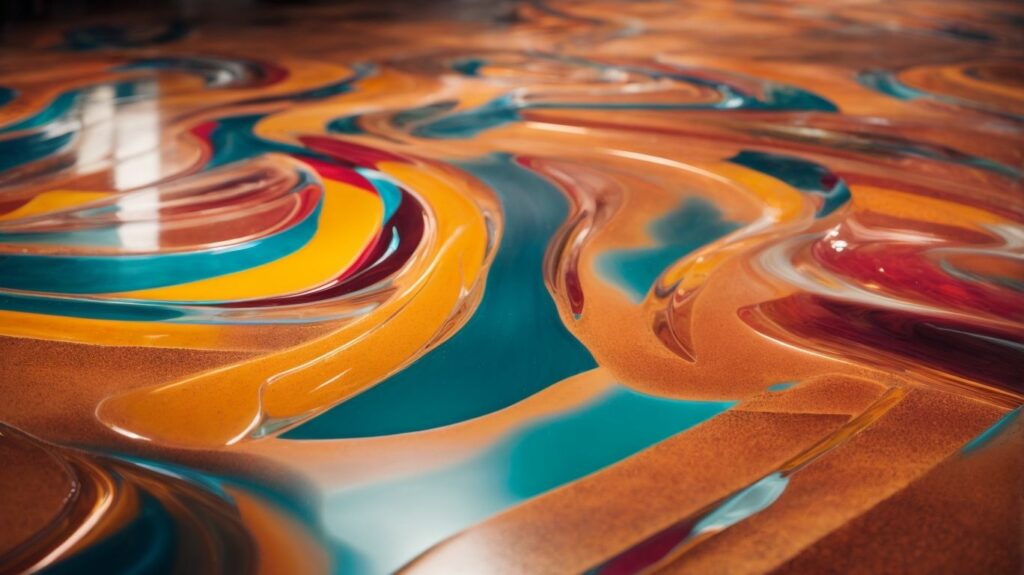
Get ready to explore the vibrant palette of epoxy floors. We will dive into the mesmerising world of epoxy floors and discover the wide array of colours available. We will also learn the art of mixing and matching for unique designs, unlocking the secrets of creating stunning patterns and designs using epoxy floors. So, buckle up and get ready to be amazed by the endless possibilities that await in this colourful realm.
Exploring various colours of epoxy floors offers limitless design possibilities and customisation options. Here are some examples:
True story: A homeowner wanted to transform their plain garage into a fun and vibrant space. They chose to explore various colours of epoxy floors and decided on a combination of blue and yellow for a playful look. The end result was a stunning garage that truly reflected their personality and added a unique touch to their home.
To achieve a stunning aesthetic, consider mixing and matching colours to create unique designs with epoxy floors. Here are some ways to do this:
By mixing and matching colours creatively, you can transform your space and create a one-of-a-kind epoxy floor design.
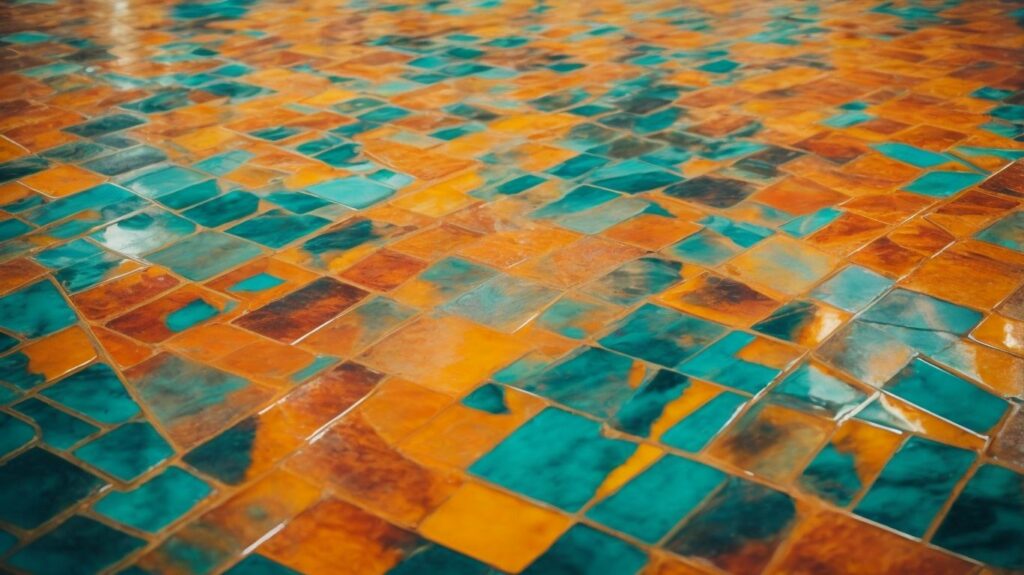
Creating patterns and designs with epoxy floors offers endless possibilities for transforming any space. Here is a step-by-step guide to achieve stunning designs:
Epoxy resin was first used in the early 20th century for electrical insulation. Its versatile properties led to its adaptation in various industries, including flooring. Today, epoxy floors are not only practical but also offer a plethora of aesthetic possibilities to elevate any space’s design. Whether it’s a residential, commercial, or industrial area, epoxy floors are a stunning choice for creating patterns and designs that stand out.
Discover the captivating world of the design applications of epoxy floors. Each sub-section of this section will unveil the unique ways in which epoxy floors can transform various settings, from enhancing the aesthetic appeal of homes to creating a professional and polished look in commercial spaces, and improving safety and functionality in industrial environments. Prepare to be inspired by the vibrant palette and dynamic potential of epoxy floors.
Enhancing the aesthetic appeal of your home with epoxy floors can be achieved through careful design choices and consideration of your space and style preferences. Here are some factors to consider when enhancing the aesthetic appeal of your home using epoxy floors:
To achieve a professional look in commercial spaces with epoxy floors, there are several steps you can follow:
In a real-life example, a local law firm transformed their office with epoxy floors. By following these steps, they achieved a professional and upscale ambiance that impressed clients and created a more productive work environment. The sleek and glossy floors added a touch of sophistication, while the seamless surface made maintenance a breeze.
Enhancing safety and functionality in industrial environments is essential for maintaining a productive and secure workspace. Here are some ways in which epoxy floors contribute to this goal:
Fact: According to a study published in the Journal of Safety Research, slip-resistant flooring, such as epoxy floors, can reduce slip and fall accidents in industrial environments by up to 90%.
Factors to Consider When Choosing Epoxy Floor Colours
When choosing epoxy floor colours, there are several important factors to consider. These factors can greatly influence your decision and help you create the perfect colour scheme for your space. Evaluating the size and layout of the area, as well as considering lighting and ambience, are all essential elements to take into account. Additionally, design and theme considerations allow you to incorporate your own personal style into the epoxy flooring. Join us as we explore these essential factors that will guide you in choosing the ideal colours for your epoxy floors, bringing your space to life.
When considering the space and size for choosing epoxy floor colours, it is important to take into account certain factors.
| Factor | Consideration |
| 1. Space | Small spaces benefit from lighter colours as they create an illusion of more space. In larger areas, darker colours can add depth and richness. |
| 2. Size | In narrow spaces, using lighter colours on the walls and darker colours on the floor can create a wider and more expansive feel. In larger areas, bold and vibrant colours can make a statement. |
To make the most of your epoxy floor colour choices, consider the dimensions and layout of the space to achieve the desired effect. Experiment with different colour combinations and consult with professionals for expert advice.
When it comes to selecting epoxy floor colours, considering lighting and ambience is crucial in order to create the desired atmosphere in your space. Here are some factors to keep in mind:
Incorporating the right lighting and ambience into your epoxy floor colour choices can transform your space and create a visually appealing and inviting atmosphere.
A restaurant owner once used warm-toned epoxy floor colours combined with soft lighting to create a cozy and intimate ambience. Customers praised the inviting atmosphere and found themselves staying longer, leading to an increase in customer satisfaction and repeat visits.
When considering epoxy floor colours, it is crucial to take into account the design and theme of your space. There are several factors to consider:
Epoxy garage floor coating offers a wide range of colors, including bold statement hues, subtle neutrals, and even iridescent effects. Homeowners in Houston can choose from various shades to create their desired aesthetic and make a lasting impression in their garage.
Epoxy garage floor coating can achieve a speckled appearance by adding epoxy flakes during the application process. These flakes come in different colors and sizes, providing a unique and transformative look to the floor.
Epoxy offers practical advantages for garage flooring. It provides a highly durable finish that can withstand heavy foot traffic and resist oil stains, hot tire pickup, and transmission fluid. The hard surface and nonporous nature of epoxy make it easy to sweep and maintain, reducing overall maintenance costs.
Yes, epoxy flooring is suitable for both commercial and industrial use. Its industrial strength layer provides long-lasting protection, making it ideal for high-traffic areas, large machinery, and humidity-prone environments. Epoxy also offers a lustrous finish that enhances visibility and creates a professional and clean aesthetic.
Users can manage their cookie settings and personalize their advertising experience on Facebook or Meta products. By accessing their account settings, they can control the use of optional cookies, review and change their advertising preferences, and choose which information is used for relevant ads. Detailed information about cookies and their use can be found in the respective privacy policies of Facebook and Meta.
Yes, Meta Audience Network enables advertisers to display relevant ads in apps and websites outside of Meta’s products. This network expands the reach of advertisements, allowing businesses to connect with users beyond the Meta ecosystem. Users can view their activities outside of Facebook, including interactions with companies and organizations.
html
Mastering the art of epoxy flooring requires careful planning and execution to ensure a successful installation. Epoxy flooring is a highly durable and versatile option that offers long-lasting protection and an attractive finish. Understanding the key aspects of epoxy flooring and following the right techniques are essential for achieving the desired results.
Before diving into the installation process, it is crucial to grasp the basics of epoxy flooring. Epoxy flooring is a type of resinous flooring system that consists of a two-part mixture, including a resin and a hardener. When combined, these two components chemically react to form a rigid, durable, and resistant surface that can withstand heavy foot traffic, impacts, stains, and chemicals.
There are several reasons why epoxy flooring is a popular choice for various applications. The seamless finish, high-gloss appearance, and availability of different colors and patterns contribute to its aesthetic appeal. Epoxy flooring offers excellent durability, easy maintenance, and resistance to abrasion, moisture, and chemicals. These qualities make it suitable for a wide range of settings, including residential garages, commercial facilities, warehouses, and industrial spaces.
Now that we have a brief understanding of epoxy flooring, let’s delve into the tips that will help you successfully install this resilient flooring option. The installation process begins with thorough preparation, and assessing the substrate is a crucial step. Proper surface preparation, including cleaning and repairing cracks and imperfections, ensures the epoxy adheres well and provides a smooth finish.
To execute a flawless epoxy flooring installation, you will need the right tools and materials. Essential tools for epoxy flooring include a power drill, epoxy mixing paddle, roller frames, spike shoes, and squeegees. Choosing the right epoxy products, such as the appropriate resin and hardener, as well as any additives or decorative elements, is equally important to achieve the desired outcome.
Following a step-by-step guide is crucial during the installation process. This includes cleaning the surface, priming the substrate, properly mixing and applying the epoxy resin, spreading the mixture evenly, and adding texture or decorative elements as desired. Understanding the curing and drying time is essential for achieving the desired hardness and durability of the epoxy flooring.
Inevitably, challenges may arise during the installation process. It is important to be prepared to troubleshoot common issues such as bubbles or pinholes, uneven coatings, and peeling or delamination. Understanding how to address these issues promptly can help salvage the installation and ensure a high-quality final result.
Finally, maintaining and extending the lifespan of your epoxy flooring requires regular cleaning and maintenance. Implementing protective measures in heavy traffic areas, such as installing mats or applying additional topcoats, can further protect the epoxy surface from wear and tear.
By following these top tips and techniques, you can master the art of epoxy flooring and achieve a successful installation that not only enhances the aesthetic appeal of your space but also provides long-lasting durability and protection.
Understanding Epoxy Flooring
Epoxy flooring is a combination of epoxy resin and hardener, creating a strong and durable surface. It is versatile and suitable for various applications, including residential, commercial, and industrial settings. It provides excellent resistance to chemicals, stains, and abrasions, and is also easy to clean and maintain, making it ideal for high-traffic areas. Proper surface preparation is crucial for a successful epoxy flooring installation. This includes thorough cleaning, repairing any cracks or imperfections, and ensuring a smooth and dry surface.
A homeowner wanted to transform their garage into a functional space. They chose to install epoxy flooring due to its durability and aesthetic appeal. After proper preparation, the epoxy flooring was installed flawlessly. The homeowner now enjoys a beautiful, easy-to-clean garage that withstands heavy use.
Epoxy flooring is a durable and versatile flooring option commonly used in commercial and industrial settings. It is created by combining resin and hardeners to form a strong and chemical-resistant surface. Epoxy flooring offers several benefits, including high durability, easy maintenance, and resistance to stains and chemicals. It is also customizable, allowing for various colours, patterns, and textures. In residential spaces, epoxy flooring is becoming more popular due to its aesthetic appeal and long-lasting properties. Epoxy flooring provides a reliable and attractive solution for creating a durable and functional floor surface.
A homeowner decided to install epoxy flooring in their garage to improve its appearance and functionality. They were impressed with how easy it was to clean and how resistant it was to stains and spills. The epoxy flooring also made their garage look more professional and spacious. They were so happy with the results that they decided to extend the epoxy flooring to other parts of their home, such as the basement and laundry room, to enjoy the same benefits throughout their living space.
Epoxy flooring offers a wide range of benefits that have made it a popular choice for residential and commercial spaces. There are several reasons why you should choose epoxy flooring:
In this section, we will discuss the important steps to prepare for a successful epoxy flooring installation. We will cover assessing the substrate, surface preparation, and repairing any cracks or imperfections. With expert tips and tricks, we will help you start your flooring project on the right track. Let’s begin by laying the groundwork for a stunning epoxy floor that will impress everyone.
Assessing the substrate is a critical step in the installation of epoxy flooring. It involves evaluating the condition of the surface where the epoxy will be applied. Here are some important factors to consider:
| – Surface condition: | Check for cracks, chips, or unevenness that may require repair before applying epoxy. |
| – Moisture levels: | Assess whether the substrate is dry or prone to moisture issues, as moisture can affect the adhesion of the epoxy. |
| – Porosity: | Determine if the substrate is porous or non-porous, as this will affect the type of epoxy primer and coating needed. |
| – Compatibility: | Ensure that the substrate is compatible with epoxy by checking its chemical resistance and reaction to the epoxy materials. |
By carefully assessing the substrate, you can address any issues beforehand and ensure a successful installation of epoxy flooring.
For optimal results, it is recommended to consult with a professional or follow the manufacturer’s guidelines for substrate assessment. Proper preparation will result in a durable and long-lasting epoxy floor.
The key to a successful epoxy flooring installation lies in proper surface preparation. Here are the steps to follow in preparing the surface for epoxy flooring:
To achieve the best results, it is recommended to consult the product manufacturer’s guidelines and follow their specific surface preparation instructions. Taking the time to properly prepare the surface will ensure a durable and long-lasting epoxy flooring installation.
Remember, a well-prepared surface is the foundation for a successful epoxy flooring project. Take the necessary steps to clean, repair, and prime the substrate to achieve optimal adhesion and a flawless finish. Happy epoxy flooring installation!
Repairing cracks and imperfections in epoxy flooring is essential for maintaining its durability and aesthetic appeal. Here are the steps to effectively repair cracks and imperfections:
By following these steps, you can effectively repair cracks and imperfections in your epoxy flooring, ensuring its longevity and attractiveness.
To achieve a flawless finish in epoxy flooring, it is essential to have the right tools and materials. In this section, we will discuss the necessary tools for epoxy flooring and how they can help you achieve success. We will also emphasize the importance of selecting the appropriate epoxy products to ensure a long-lasting installation. So, let’s get started and explore the key elements for successful epoxy flooring.
When it comes to epoxy flooring installation, it is crucial to have the right tools for a successful result. Here are some essential tools you’ll need for epoxy flooring:
|
With these essential tools, you will be well-equipped to tackle your epoxy flooring installation project.
Epoxy flooring has gained popularity in various industries over the years due to its durability, versatility, and aesthetic appeal. The use of epoxy dates back to the early 20th century when it was primarily used for industrial applications. Since then, advancements in technology and the development of more user-friendly formulations have made epoxy flooring accessible for residential and commercial use. Today, epoxy flooring is a popular choice for garages, warehouses, retail spaces, and even homes, providing a seamless and long-lasting flooring solution.
When selecting the appropriate epoxy products for your flooring project, it is crucial to take into account the following factors:
With these considerations in mind, you can select the appropriate epoxy products that will meet your flooring needs and provide long-lasting results.
Epoxy flooring has been used in various industrial and commercial applications for decades. Its origins can be traced back to the early 20th century when epoxy resin was first developed as a coating material. Over time, advancements in technology and formulation have led to the creation of epoxy products specifically designed for different flooring requirements. Today, epoxy flooring offers a durable, seamless, and attractive solution for a wide range of spaces, from warehouses and factories to retail stores and residential garages.
Looking to achieve a flawless epoxy flooring installation? Look no further! This step-by-step guide will take you through the process of achieving a successful epoxy flooring installation. From cleaning the surface to spreading the epoxy mixture, and even adding decorative elements, we’ll cover all the essential steps you need to know. Get ready to transform your floors and create a stunning, durable, and long-lasting epoxy finish. Let’s dive in!
To achieve a successful installation of epoxy flooring, it is crucial to clean the surface properly. Follow these steps to clean the surface before applying epoxy:
Fun Fact: Properly cleaning the surface enhances the adhesion of the epoxy coating, resulting in a more durable and long-lasting flooring solution.
Priming the substrate is an essential step in the epoxy flooring installation process as it guarantees proper adhesion and a long-lasting finish. Here are the steps involved in priming the substrate:
By properly priming the substrate, you establish a solid foundation for the epoxy coating, ensuring a smooth and durable finish.
Mixing and applying the epoxy resin is a crucial step in the installation of epoxy flooring. Here is a step-by-step guide to ensure a successful application:
Did you know? The use of epoxy resin dates back to ancient Egypt, where it was used as an adhesive in woodworking and pottery. Over time, the material evolved and is now widely used for various applications, including flooring, due to its durability and chemical resistance.
Pro-tip: To achieve a smooth and flawless finish, it is important to maintain a consistent spreading technique and work efficiently to avoid any inconsistencies in the epoxy layer.
Adding texture or decorative elements to epoxy flooring can enhance the appearance and style of any space. Here are some options to consider:
The use of decorative elements in flooring is not a recent trend. In fact, archaeological evidence suggests that ancient civilisations, such as the Egyptians and Romans, used various materials and techniques to create decorative flooring designs. These early flooring designs incorporated elements like mosaic tiles, marble patterns, and intricate geometric motifs. Today, the availability of modern materials and techniques, such as epoxy flooring, offers even more possibilities for adding texture and decorative elements to create visually stunning floors.
Curing and drying time is an essential aspect of epoxy flooring installation as it determines when the floor can be fully utilized. Here is a list of important points to consider regarding the curing and drying time of epoxy flooring:
By understanding and adhering to the recommended curing and drying time, you can ensure the longevity and durability of your epoxy flooring.
Troubleshooting Common Issues
Having trouble with your epoxy flooring? Don’t worry, we’ve got you covered! In this section, we’ll address some of the common issues that occur during epoxy flooring installations. From bubbles or pinholes to uneven coatings and peeling or delamination, we’ll provide tips and solutions to help you troubleshoot and overcome these challenges. Get ready to become an expert in epoxy flooring with our expert advice!
Dealing with bubbles or pinholes is a common issue when installing epoxy flooring. Here are some steps to effectively address this problem:
Proper Mixing: Ensure that you thoroughly mix the epoxy resin and hardener to prevent the formation of air bubbles.
Surface Preparation: Make sure the surface is clean and free from any contaminants that could cause bubbles or pinholes.
Rolling Technique: Use a roller to evenly spread the epoxy mixture, applying light pressure to release any trapped air.
Torching: After applying the epoxy, use a heat gun or torch to lightly pass over the surface to remove any remaining bubbles.
Sanding and Re-coating: If bubbles or pinholes still appear after curing, sand the surface and apply a new layer of epoxy to achieve a smooth finish.
Pro-tip: Make sure to properly prepare the surface and follow the manufacturer’s instructions for the epoxy product to prevent uneven coatings.
When addressing peeling or delamination with epoxy flooring, it is important to take prompt action to prevent further damage and maintain the longevity of the floor. Here are the steps to address this issue:
Incorporating these steps into your epoxy flooring maintenance routine will help prevent peeling or delamination and ensure a successful and long-lasting installation.
Epoxy flooring was first developed and used in the early 20th century for industrial purposes due to its durability and chemical resistance. Over time, its popularity grew, and it began to be used in commercial and residential settings. Today, epoxy flooring has become a popular choice for its aesthetic appeal, easy maintenance, and long lifespan. Its versatility and ability to withstand heavy traffic and varying conditions have made it a go-to option for countless industries and homeowners alike.
Translated text:To ensure the longevity and beauty of your epoxy flooring, it is crucial to maintain it properly. In this section, we will discuss practical tips for maintaining and extending the lifespan of your epoxy flooring. We will cover effective cleaning techniques and protective measures for high-traffic areas. Let’s explore the secrets to keeping your epoxy flooring in pristine condition, so you can enjoy its benefits for years to come!
Pro-tip: Avoid using harsh chemicals or abrasive cleaners as they can damage the epoxy surface. Regular cleaning will help maintain the shine and integrity of your epoxy flooring for years to come.
To ensure the protection of epoxy flooring in heavy traffic areas, it is important to consider implementing the following measures:
Choose high-quality epoxy products that are specifically designed for heavy use and durability.
Apply multiple coats of epoxy to provide an additional layer of protection.
Install mats or rugs in high-traffic areas to reduce wear and tear on the epoxy surface.
Maintain regular cleaning and maintenance of the epoxy floor to prevent dirt and debris from causing any damage.
Consider applying a topcoat or sealant to further enhance the resistance of the epoxy floor.
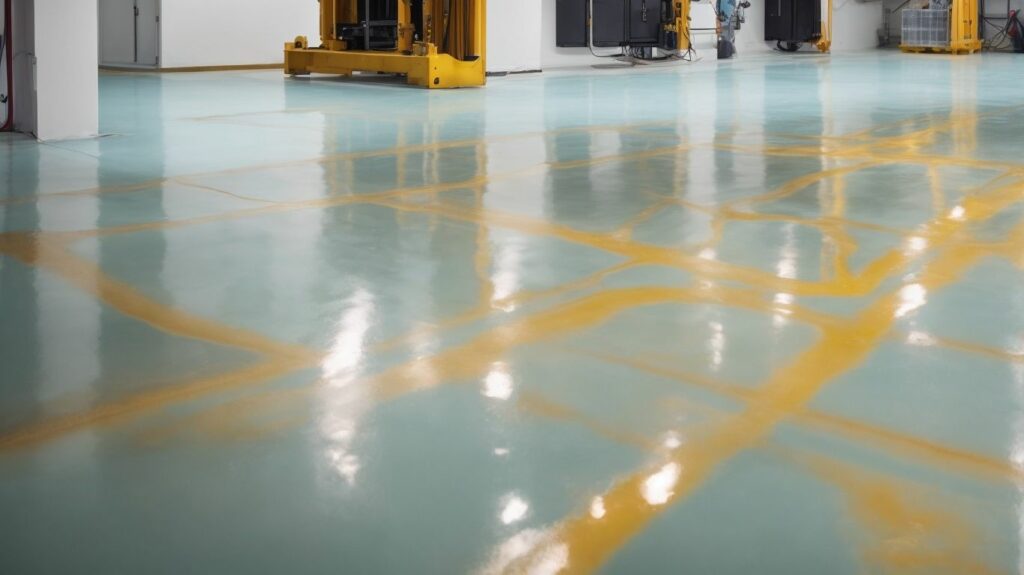
Epoxy flooring is a type of surface coating that provides a glossy and resilient finish. It has been gaining popularity in commercial, industrial, and residential settings due to its aesthetic appeal and durability.
For successful epoxy flooring installation, several specialized tools are necessary. These include shot blasters for surface cleaning and profiling, diamond grinders for leveling or removing tougher coatings, mixing drills and paddles for homogeneous epoxy preparation, squeegees and rollers for application, spike shoes for foot traffic during application, and non-skid aggregates for slip resistance.
Surface preparation is a crucial step in epoxy flooring installation. It involves the use of shot blasters to remove old coatings and contaminants, diamond grinders to smoothen irregularities, and industrial vacuums to eliminate residual dust and debris. Proper surface preparation ensures optimal adhesion and a smooth finish for the epoxy.
During epoxy flooring installation, professionals should wear protective gear such as respirators, protective eyewear, and gloves to safeguard against harmful fumes released by the epoxy. Adequate ventilation, achieved through high-quality fans and ventilation systems, is necessary in enclosed spaces to reduce fume concentrations and maintain a safe working environment.
Epoxy flooring installation requires expertise and the use of specialized equipment. Professionals have the knowledge and experience to ensure meticulous preparation, uniform application, and a flawless finish. Hiring a professional ensures that the epoxy flooring is installed correctly and provides long-lasting results.
For more detailed information about epoxy flooring equipment and its proper use, it is recommended to contact a professional in the field. They can provide expert guidance and advice tailored to specific project requirements.
DIY to the Rescue: A Step-by-Step Guide to Repairing Epoxy Flooring
Epoxy flooring is a popular choice for its numerous benefits, such as durability, easy maintenance, resistance to chemicals and stains, and enhanced safety. However, like any flooring material, epoxy floors can encounter issues over time. To help you address common problems and restore your epoxy flooring, here is a step-by-step guide.
Benefits of Epoxy Flooring
Common Issues with Epoxy Flooring
Step-by-Step Guide to Repairing Epoxy Flooring
Tips for Maintaining Epoxy Flooring
By following this guide and implementing proper maintenance practices, you can restore your epoxy flooring and ensure its longevity and visual appeal.
Looking to upgrade your flooring? Discover the incredible benefits of epoxy flooring. From unparalleled durability and easy maintenance to enhanced safety and resistance to chemicals and stains, epoxy flooring is truly a game-changer. So forget about costly replacements and join us as we explore why epoxy flooring should be your top choice. Get ready for a floor that not only looks stunning but also stands the test of time.
Durability and longevity are important factors to consider when selecting epoxy flooring. The following are some reasons why epoxy flooring is renowned for its durability and longevity:
Pro-tip: To maximise the durability and longevity of your epoxy flooring, make sure to follow the manufacturer’s maintenance guidelines and promptly address any repairs or issues that may arise.
Epoxy flooring is renowned for its easy maintenance, which is why it is a popular choice for various spaces. Here are some reasons why:
Fun Fact: With proper maintenance, epoxy coatings can last for up to 20 years or more, providing long-lasting and cost-effective flooring solutions.
Epoxy flooring offers excellent resistance to chemicals and stains, making it a popular choice for industrial and commercial settings. This type of flooring provides a protective barrier that prevents spills and stains from penetrating the surface, making it easier to clean and maintain. Here are some key benefits of epoxy flooring in terms of resistance to chemicals and stains:
True story: A manufacturing facility had epoxy flooring installed in their production area. One day, a chemical spill occurred, but thanks to the epoxy flooring’s excellent resistance to chemicals, the spill was quickly contained and cleaned up without causing any damage to the underlying concrete. The seamless and stain-resistant nature of the epoxy flooring saved the company time and money in repair and maintenance costs.
Enhancing safety is a crucial aspect of epoxy flooring. It helps prevent accidents and injuries in various settings by creating a slip-resistant surface and improving visibility. Here are some ways epoxy flooring enhances safety:
By incorporating these safety features, epoxy flooring ensures a secure environment for both employees and customers.
Dealing with common issues with epoxy flooring? Let’s address them head-on! From crack formation to bothersome bubbles and unsightly discoloration, we will explore each problem in detail and reveal the secrets to resolving them. Say goodbye to flooring headaches as we delve into practical solutions that will leave your epoxy floors looking flawless. No need to worry, we’ve got you covered throughout the entire process!
Crack formation is a common issue with epoxy flooring. It is usually caused by factors such as improper installation, poor substrate preparation, or heavy impact. To repair cracks in epoxy flooring, follow these steps: assess the damage, prepare the surface, remove the damaged coating, repair the cracks using epoxy filler, and finally apply a new epoxy coating. Regular maintenance is essential to prevent future cracks. Additionally, a true story recounts how a homeowner experienced crack formation in their garage epoxy flooring due to heavy furniture being moved. They successfully repaired it using the aforementioned steps.
Inspect the affected areas to determine the extent of the bubbles or blisters.
Thoroughly clean and prepare the surface by removing any dirt, dust, or grease.
Use appropriate tools and techniques to remove the existing epoxy coating from the affected areas.
Fix any cracks or damaged areas using epoxy crack fillers or patching compounds.
Release trapped air by carefully puncturing each bubble or blister and then leveling the surface.
If discoloration occurs, follow the manufacturer’s instructions to apply the appropriate stain or pigment.
Apply a new layer of epoxy coating, following the recommended application procedures.
To prevent bubbles or blistering in the future, ensure proper surface preparation, use high-quality epoxy products, and follow the manufacturer’s guidelines closely. Regular maintenance, including cleaning and avoiding harsh chemicals, can also help maintain the integrity of the epoxy flooring.
Epoxy flooring is a common issue that can be caused by several factors. It can occur due to exposure to UV rays, chemical spills, or improper installation. To address discoloration, follow these steps:
1. Assess the damage: Determine the extent and cause of the discoloration.
2. Surface preparation: Thoroughly clean the floor to remove any dirt or debris.
3. Removing epoxy coating: Use a floor grinder or chemical stripper to remove the discoloured epoxy layer.
4. Addressing discoloration: If the discolouration is due to UV exposure, apply a UV-resistant epoxy coating to prevent future fading.
5. Applying new epoxy coating: Once the floor is prepped, apply a new layer of epoxy coating, following the manufacturer’s instructions.
Regular maintenance, including cleaning and resealing, can help prevent discoloration and keep your epoxy flooring looking its best.
In this guide, we will take you through the process of repairing epoxy flooring. We will cover every aspect of the repair process, starting from assessing the damage to applying a fresh coat of epoxy. Prepare yourself to get your hands dirty and turn your damaged epoxy flooring into a smooth and long-lasting surface. Let’s get started and learn how you can bring back the former glory of your flooring!
Assessing the damage to your epoxy flooring is an important first step in the repair process. Look for cracks, bubbles or blistering, and discolouration. Evaluate the extent of the damage to determine the appropriate repairs needed. Thoroughly inspect the affected areas and make a note of any additional issues. This assessment will guide your surface preparation and help you determine the best approach to repairing the specific damage. Remember, proper assessment is crucial for a successful epoxy flooring repair. Fun fact: Assessing the damage accurately can prevent further problems and ensure a longer lifespan for your epoxy flooring.
Before repairing epoxy flooring, it is crucial to carry out proper surface preparation to ensure successful and long-lasting results. Here is a step-by-step guide to surface preparation:
By following these steps, you will ensure that the epoxy repair adheres properly and provides a sturdy and seamless finish.
To remove epoxy coating, start by following these steps:
By following these steps, you can successfully remove epoxy coating from your floor.
To repair cracks in epoxy flooring, follow these steps:
Dealing with bubbles or blistering in epoxy flooring involves identifying the cause and taking the necessary steps to fix the problem. Here is a step-by-step guide to addressing bubbles or blistering:
True story: A homeowner noticed bubbles forming in their recently installed epoxy floor. After researching the issue, they discovered that excess moisture was the cause. They resolved it by installing a vapor barrier before reapplying the epoxy, ensuring a smooth and bubble-free surface.
To address discoloration in epoxy flooring, follow these steps:
1. Determine the cause of discoloration, such as exposure to UV rays or chemical spills.
2. Thoroughly clean the affected area using a mild detergent and water.
3. If the discoloration is a result of UV damage, consider applying a UV-resistant topcoat to prevent future colour fading.
4. For stubborn stains, use a chemical cleaner specifically designed for epoxy floors, following the manufacturer’s instructions.
5. If the discoloration persists, lightly sand the affected area to remove the top layer of epoxy and reveal a fresh surface.
6. Apply a new layer of epoxy paint or coating to restore the colour and finish of the flooring.
7. Regularly maintain the epoxy flooring by cleaning it with gentle, non-abrasive cleaners and avoiding harsh chemicals and excessive sunlight exposure to prevent further discoloration.
To apply a new epoxy coating, follow these steps:
Maintaining epoxy flooring is crucial for its longevity and appearance. Here are some tips to ensure that your epoxy flooring remains in optimal condition:
The process for creating a DIY designer epoxy resin floor involves several steps:
The necessary materials for creating a DIY designer epoxy resin floor include:
To calculate the amount of resin needed for your DIY designer epoxy resin floor, follow these steps:
When working with DIY epoxy resin flooring, it is important to take the following precautions:
DIY designer epoxy resin flooring offers several benefits, including:
The copyright for the DIY designer epoxy resin floor information belongs to Google LLC in 2023.
The durability of epoxy flooring has gained significant attention in recent years, with comparative studies shedding light on its exceptional performance. Epoxy flooring offers a range of benefits that make it a popular choice for commercial and industrial spaces. This article will explore the advantages of epoxy flooring, including its durability and longevity, chemical resistance, easy maintenance and cleaning, and its aesthetic appeal and customization options.
Comparative studies have been conducted to assess the effectiveness of epoxy flooring against other flooring options. A comprehensive analysis comparing epoxy flooring with ceramic tiles, vinyl flooring, and carpet will help determine the superiority of epoxy in terms of durability and performance. In addition, comparative studies with other coating systems like urethane and acrylic coatings will provide valuable insights into the unique qualities of epoxy flooring.
When considering epoxy flooring for a specific location, several factors need to be taken into account. Factors such as traffic and usage, installation environment, and cost and budget should be carefully considered to make an informed decision and ensure optimal performance.
Lastly, this article will cover the essential maintenance and care steps required to maintain the longevity and performance of epoxy flooring. Understanding these practices will help owners and facility managers uphold the durability and aesthetic appeal of epoxy flooring over its lifespan.
By delving into comparative studies and discussing crucial factors in choosing and maintaining epoxy flooring, this article aims to provide a comprehensive understanding of the durability and performance of epoxy flooring in various settings.
Discover the remarkable advantages of epoxy flooring that make it a popular choice among homeowners and businesses. Epoxy flooring offers unmatched durability, longevity, and exceptional chemical resistance, making it a solid foundation for any space. It requires minimal maintenance and cleaning and provides a wide range of aesthetics and customization options to suit diverse preferences. Get ready to explore the world of epoxy flooring and discover the incredible benefits it offers.
Durability and longevity are important considerations when choosing epoxy flooring. Epoxy floors are renowned for their exceptional durability, making them well-suited for high-traffic areas like warehouses and commercial spaces. With proper maintenance, epoxy floors can last for many years without the need for frequent repairs or replacement. Unlike alternative flooring options such as ceramic tiles or carpet, epoxy floors exhibit high resistance to wear and tear, staining, and damage from chemicals or heavy machinery. This durability ensures that your investment in epoxy flooring will yield long-lasting results, ultimately saving you time and money.
Chemical resistance is a major advantage of epoxy flooring, making it suitable for various industries and environments.
| Chemical | Effect on Epoxy Flooring |
| Acids | Offers high resistance, protecting against corrosion |
| Alkalis | Resistant to alkaline substances, preventing damage |
| Oils and Solvents | Tolerates exposure, minimizing staining |
Epoxy flooring is known for its easy maintenance and cleaning, making it a popular choice for various spaces. To keep epoxy floors in top condition, follow these steps:
Epoxy flooring provides a wide range of options for aesthetics and customization, making it a popular choice for both residential and commercial spaces.
To achieve the desired aesthetics and customisation in epoxy flooring, it is important to work with a professional installer who can assist in selecting the appropriate colours, patterns, and finishes to suit specific needs and preferences.
Comparative Studies: Epoxy Flooring vs Other Flooring Options
Comparing the durability of epoxy flooring with other popular flooring options is a game-changer. We will explore the details of epoxy flooring and compare it to ceramic tiles, vinyl flooring, and even carpet. Prepare yourself for some enlightening insights and find out which flooring option excels in terms of longevity, maintenance, and overall performance. No unnecessary information, only solid facts supported by comparative studies. Let us reveal the ultimate winner in the battle of the floors!
Epoxy flooring and ceramic tiles are both popular flooring options, each with their own advantages based on individual needs and preferences. When choosing between epoxy flooring and ceramic tiles, it’s important to consider the following factors:
Considering these factors will help you make an informed decision based on your specific requirements and desired outcome for your space.
Epoxy flooring has a long history of use in industrial and commercial settings due to its unmatched durability and resistance to chemicals and heavy machinery. On the other hand, ceramic tiles have been used for centuries and are valued for their beauty and longevity. Today, both epoxy flooring and ceramic tiles remain popular choices for various applications, offering different benefits that cater to different needs and design preferences.
Epoxy flooring and vinyl flooring are popular options for both residential and commercial spaces. When deciding between the two, it is important to consider the following factors:
Consider these aspects based on your specific needs and preferences to make the right choice between epoxy flooring and vinyl flooring.
Epoxy flooring and carpet are two popular flooring options, each with its own advantages and disadvantages. Here are some key points to consider:
True story: Sarah, a busy homeowner with two young children, had carpets in her living room. Despite regular cleaning, the carpets always looked dingy and stained due to spills and muddy footprints. Frustrated, Sarah decided to switch to epoxy flooring, which not only improved the aesthetics but also made cleaning a breeze. She no longer had to worry about stains and could enjoy a beautiful and low-maintenance flooring solution.
Comparative Studies: Epoxy Flooring vs Other Coating Systems
Comparing the contenders in the flooring industry, we will explore the durability of epoxy flooring through comparative studies. We will uncover the strengths and weaknesses of epoxy flooring in comparison to urethane coating and acrylic coating. Through this analysis, we aim to determine which coating system is superior in the battle of the floors.
Epoxy flooring and urethane coating are two popular options for floor coatings. When comparing the two, it is important to consider several factors:
Epoxy flooring and acrylic coating are both popular options for protecting and enhancing floors. Here is a comparison table highlighting their differences:
| Category | Epoxy Flooring | Acrylic Coating |
|---|---|---|
| Appearance | Durable and glossy finish | Semi-glossy or matte finish |
| Protection | High resistance to chemicals, impacts, and abrasions | Good resistance to mild chemicals and abrasions |
| Application | Requires professional installation due to complex preparation and curing process | Easy to apply by a DIY enthusiast |
| Durability | Long-lasting and can withstand heavy foot and vehicle traffic | Less durable, better suited for low-traffic areas |
Mike, a homeowner, wanted to upgrade his garage floor. After researching, he decided to go for epoxy flooring due to its superior durability and protection. He hired professionals to install the epoxy coating, and he was thrilled with the glossy and durable finish. Several years later, even with heavy machinery use, the epoxy flooring still looks as good as new, proving its longevity and making Mike a happy customer.
Factors to Consider when Choosing Epoxy Flooring
When selecting epoxy flooring, there are important factors that require careful consideration. We will discuss these factors to help you make an informed decision. These factors include the effects of traffic and usage, the installation environment, and your budgetary constraints. By examining these factors, we can determine which epoxy flooring option offers the greatest strength and durability for your needs. It is now time to choose the most suitable flooring option for you.
When choosing epoxy flooring, it is important to consider the traffic and usage of the space where it will be installed. This will help determine the type and thickness of epoxy coating needed for optimal performance and durability.
| Factor to Consider | Description |
| Traffic | Consider the amount of foot traffic, vehicle traffic, and the type of equipment that will be used in the space. Areas with heavy traffic may require a thicker epoxy coating and additional topcoat for added protection. |
| Usage | Think about the specific activities that will take place on the epoxy floor. Different environments have different requirements. For example, a factory or warehouse may need an epoxy floor that is resistant to chemicals, oil, and impact, while a commercial kitchen may require a floor that is slip-resistant and easy to clean. |
The installation environment is a crucial factor to consider when selecting epoxy flooring. Here are the steps to take into account:
Pro-tip: Seek advice from a professional epoxy flooring contractor to evaluate the installation environment and receive personalized recommendations based on your specific requirements.
Considering the cost and budget is crucial when choosing epoxy flooring. It is important to determine the overall cost of the flooring material, installation, and any additional features or customization options. Here is a breakdown of various factors to consider:
| Factors | Considerations |
| Traffic and Usage | Higher traffic areas may require more durable and thicker epoxy coatings, which may increase the cost. |
| Installation Environment | Factors such as temperature, humidity, and substrate condition can impact the complexity and cost of the installation. |
| Material and System Choice | Different epoxy flooring systems have varying costs, so it is important to choose one that fits within your budget without compromising on quality. |
| Additional Features and Customization | Options like decorative flakes, colours, and patterns can enhance the aesthetics but may add to the overall cost. |
Taking proper care of epoxy flooring is essential for maintaining its durability and appearance. Below are some tips for the maintenance and care of epoxy flooring:
Epoxy flooring offers a seamless and gap-free surface, making it easy to clean and maintain. It is also more durable and stain-resistant, making it suitable for high footfall areas and rooms prone to spills. On the other hand, tile flooring offers a wide range of design options and can be customized with different colors, patterns, and shapes.
Both epoxy flooring and terrazzo flooring provide a seamless finish, but terrazzo flooring combines decoration with a seamless finish. Epoxy flooring, on the other hand, offers customization options with different colors and finishes.
Durability testing for epoxy flooring includes abrasion resistance tests, impact resistance tests, and chemical resistance tests. These tests assess the flooring’s ability to withstand wear and tear, damage from heavy objects or collisions, and resistance to chemical spills and corrosive substances.
Abrasion resistance tests for epoxy flooring measure the amount of material removed from the flooring using a rotating abrasive wheel. Lower abrasion loss indicates greater durability.
Epoxy flooring is a popular choice in commercial and industrial sectors due to its durability, ease of maintenance, and resistance to harsh elements. It is suitable for various industries, including food processing plants, pharmaceutical production, printing houses, and chemical processing plants.
Slip resistance testing measures the coefficient of friction on epoxy flooring, ensuring it provides a safe and slip-resistant surface. This testing helps assess the flooring’s suitability for areas where health and safety is a concern, such as health facilities, commercial properties, military installations, and space exploration facilities.
Say Goodbye to Problems: Preventing Common Issues in Epoxy Flooring: Cracks, Bubbles, and Stains
Introduction:
Epoxy flooring offers a durable and attractive solution for various residential, commercial, and industrial spaces. However, like any other flooring option, it is not without its challenges. Understanding the common problems associated with epoxy flooring and adopting preventive measures can help maintain its integrity and longevity. In this article, we will explore the concept of epoxy flooring, the reasons behind its popularity, and the prevention tips for the common issues of cracks, bubbles, and stains. By implementing these strategies, you can say goodbye to these problems and enjoy a resilient and flawless epoxy floor.
Understanding Epoxy Flooring:
Epoxy flooring is a type of surface coating that consists of epoxy resin and a hardening agent. When applied to a prepared concrete floor, it forms a strong, seamless, and highly durable surface. Epoxy flooring offers numerous benefits such as chemical resistance, ease of maintenance, and aesthetic appeal, making it a popular choice for various settings, including garages, warehouses, hospitals, and homes.
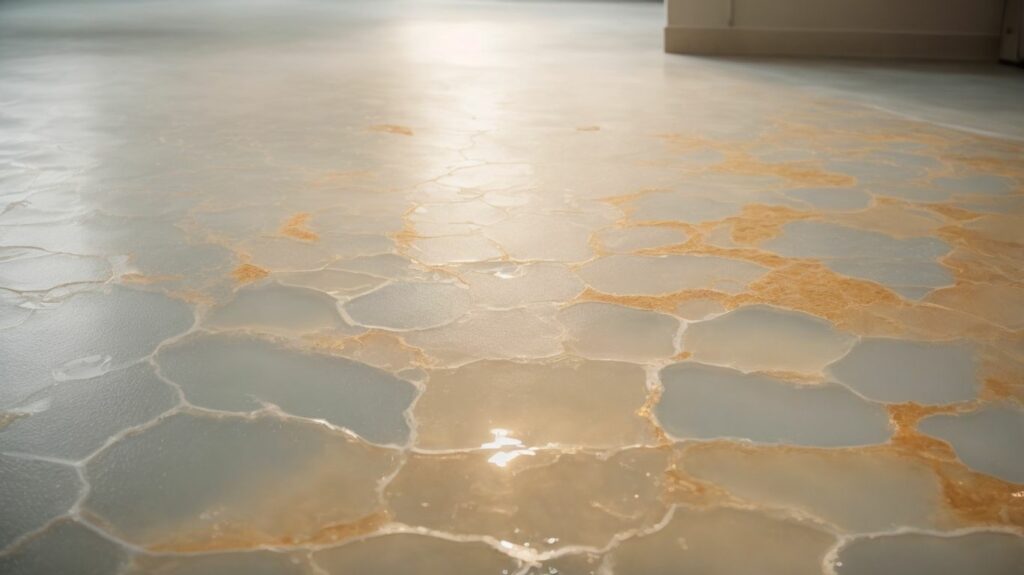
Common Problems in Epoxy Flooring:
Despite its durability, epoxy flooring can face common issues such as cracks, bubbles, and stains. Cracks can occur due to improper surface preparation, heavy impacts, or substrate movement. Bubbles can form as a result of moisture or air trapped beneath the epoxy coating during application. Stains can occur due to chemical spills or inadequate cleaning and maintenance practices. Understanding the causes of these problems is crucial in taking preventive measures.
Prevention Tips for Cracks in Epoxy Flooring:
To prevent cracks in epoxy flooring, proper surface preparation is essential. This includes thoroughly cleaning the substrate, repairing any existing cracks or damages, and ensuring an even and stable surface. Choosing the right epoxy coating for your specific needs and applying it in ideal environmental conditions, such as suitable temperature and humidity levels, can also help prevent cracks from occurring.
Prevention Tips for Bubbles in Epoxy Flooring:
Eliminating moisture and air trapped beneath the epoxy coating is key to preventing bubbles. Proper moisture testing and addressing any underlying moisture issues before application are crucial steps. Choosing the right roller or applicator and using proper mixing and application techniques, such as backrolling, can help ensure a smooth and bubble-free epoxy surface.
Prevention Tips for Stains on Epoxy Flooring:
Regular cleaning and maintenance are essential in preventing stains on epoxy flooring. Promptly cleaning up spills, especially those involving harsh chemicals, can prevent them from penetrating the epoxy and causing permanent stains. Using appropriate cleaning products, avoiding abrasive materials, and applying protective measures to minimize spills can further protect the epoxy surface and maintain its appearance.
By following these preventive tips, you can overcome the common problems of cracks, bubbles, and stains in epoxy flooring. With proper care and maintenance, you can enjoy a beautiful, durable, and problem-free epoxy floor for years to come.
Preventing common issues in epoxy flooring is essential for maintaining a flawless and long-lasting surface. This guide unveils proven techniques to prevent cracks, bubbles, and stains. By implementing these preventive measures, you can eliminate the headaches caused by these problems and enjoy a beautiful, durable epoxy floor. Let’s explore the secrets to achieving seamless and problem-free flooring.
When it comes to epoxy flooring, it is important to understand its benefits and potential issues. This article provides an introduction to epoxy flooring by discussing its popularity and common problems that can occur. Additionally, it offers prevention tips for cracks, bubbles, and stains in epoxy flooring. To prevent cracks, it is crucial to properly prepare the surface, use the right epoxy coating, and apply the epoxy in ideal environmental conditions. Eliminating trapped moisture and air, selecting the appropriate roller or applicator, and employing proper mixing and application techniques can help avoid bubbles in the epoxy flooring. Regular cleaning and maintenance, along with the use of appropriate cleaning products and protective measures, can prevent stains on the epoxy flooring. By following these prevention tips, epoxy flooring can maintain its aesthetic appeal and provide a long-lasting finish.
Epoxy flooring is a popular choice for both residential and commercial spaces due to its durability and aesthetic appeal. Understanding epoxy flooring is crucial to ensure its correct installation and maintenance. Epoxy flooring is a combination of resin and hardener that, when applied to a surface, creates a strong and seamless finish. It is resistant to cracks, bubbles, and stains, making it ideal for high-traffic areas. Proper preparation of the surface and following the manufacturer’s instructions are essential for achieving a successful epoxy flooring installation. Regular cleaning and maintenance will help prolong the lifespan of epoxy flooring and keep it looking its best.
Epoxy flooring is a popular choice for both residential and commercial spaces in the UK due to its durability, aesthetics, and low maintenance requirements. It is a type of flooring system that consists of a combination of resin and hardener, which chemically react to create a strong and durable surface. Epoxy flooring provides a sleek and shiny finish while also acting as a moisture barrier, making it ideal for areas with regular wear or potential moisture build-up. Proper surface preparation, correct mixing and application techniques, and professional installation by experienced flooring technicians are essential to avoid common issues such as cracks, bubbles, and stains.
True story: A business owner in the UK recently decided to install epoxy flooring in their commercial space. They wanted a durable and visually appealing flooring option that could withstand heavy foot traffic. After consulting with a professional resin flooring specialist and following the recommended installation process, they were able to achieve a flawless epoxy floor that not only enhanced the aesthetic appeal of their space but also provided long-lasting durability. The business owner was extremely satisfied with the outcome and continued to receive compliments on their sleek and shiny epoxy flooring.
Epoxy flooring is popular for several reasons. Firstly, it is highly durable and resistant to wear, impact, and chemicals, making it perfect for high-traffic areas. Additionally, epoxy floors are easy to clean and maintain, requiring only regular cleaning to keep them looking their best. Furthermore, epoxy floors offer aesthetic appeal as they come in a wide range of colours and finishes, allowing for customisation and creating visually appealing spaces. Moreover, epoxy floors have a long lifespan, making them a cost-effective flooring option in the long run. Lastly, epoxy can be applied to various surfaces such as concrete, metal, and wood, making it suitable for both residential and commercial spaces.
When it comes to epoxy flooring, there are a few common problems that can occur. From cracks and bubbles to stains, these issues can be quite troublesome. In this section, we will discuss each of these problems, including their causes and potential solutions. If you want to keep your epoxy floor in perfect condition, stay with us and we will guide you on how to eliminate these issues.
Cracks in epoxy flooring can be a common problem if not properly prevented. To avoid cracks in epoxy flooring, follow these tips:
By following these prevention tips, you can ensure that your epoxy flooring remains crack-free and maintains its durability over time. Remember that seeking the help of qualified flooring technicians can help ensure the best results.
Bubbles in epoxy flooring can be unsightly and compromise the integrity of the floor. Here are some prevention tips to avoid this issue:
Properly prepare the surface by thoroughly cleaning and degreasing it.
Use the correct roller or applicator to ensure even application.
Follow the manufacturer’s guidelines for mixing and applying the epoxy.
Avoid moisture and air getting trapped under the epoxy by eliminating any sources of moisture and ensuring proper ventilation during application.
By following these tips, you can minimize the chances of bubbles forming in your epoxy flooring and achieve a smooth and professional finish.
Bubbles forming in epoxy flooring have been a common issue for many years. Contractors and DIY-ers alike have faced challenges in achieving a bubble-free surface. With advancements in epoxy technology and improved application techniques, the occurrence of bubbles has significantly reduced in modern epoxy flooring systems. Professional resin flooring specialists now have the expertise and equipment needed to prevent and address this issue, ensuring a flawless and long-lasting finish.
Stains on epoxy flooring can be unsightly and difficult to remove if not properly addressed. Here are some prevention tips to keep your epoxy floor free from stains:
Regular Cleaning and Maintenance: Clean spills promptly using a mild detergent and a soft cloth or mop.
Using Appropriate Cleaning Products: Avoid harsh chemicals that can damage or discolour the epoxy floor. Use pH-neutral cleaners recommended for epoxy surfaces.
Protective Measures to Minimise Spills: Place mats or rugs in high-traffic areas or areas prone to spills to prevent direct contact with the epoxy floor.
Fact: Did you know that epoxy flooring is known for its durability and resistance to stains, making it a popular choice for commercial and industrial spaces?
Prevention Tips for Cracks in Epoxy Flooring
Maintaining the durability and aesthetic appeal of epoxy flooring requires preventing cracks. This section explores practical tips to ensure your epoxy flooring remains crack-free. From proper surface preparation to selecting the suitable epoxy coating and applying it in ideal environmental conditions, we provide valuable insights to help you prevent cracks in your epoxy flooring. These expert tips will help you bid farewell to the headaches caused by cracked flooring.
Proper surface preparation is essential for the successful installation of epoxy flooring. Follow these steps for effective surface preparation:
Proper surface preparation has been a critical aspect of flooring installations for centuries. Ancient Romans used crushed stone and lime mortar to create durable and aesthetically pleasing surfaces. By meticulously preparing the surfaces, they were able to achieve long-lasting and beautiful floors. This practice has continued to evolve over time, with modern technologies and techniques ensuring that floors not only look good but also withstand the test of time. Today, qualified flooring technicians employ advanced methods and utilize industrial-grade equipment to ensure proper surface preparation, resulting in flawless epoxy flooring installations.
Choosing the right epoxy coating is crucial to ensure a successful and long-lasting installation of epoxy flooring. Here are the steps you should follow when selecting the appropriate epoxy coating:
Applying epoxy in ideal environmental conditions is crucial to ensure a successful and durable flooring installation.
Historically, applying epoxy in ideal environmental conditions has been essential for achieving high-quality and long-lasting epoxy flooring. In ancient Egypt, builders had to carefully choose the time of year and temperature to apply resin-based coatings to their structures. They noticed that applying epoxy during hot and humid days led to poor adhesion, while cool and dry conditions produced a flawless finish. This ancient wisdom continues to guide modern-day epoxy flooring specialists in ensuring optimal conditions for successful installations.
Prevention Tips for Bubbles in Epoxy Flooring
Achieving a flawless finish in epoxy flooring requires preventing bubbles. This section will provide the best tips to ensure bubble-free epoxy surfaces. The tips include eliminating trapped moisture and air, selecting the appropriate roller or applicator, and mastering proper mixing and application techniques. With this knowledge and skillset, you can prevent bubbles from appearing in your epoxy flooring and enjoy a smooth, seamless floor.
To eliminate moisture and air trapped under epoxy flooring, follow these steps:
Prepare the surface: Ensure the concrete floor is clean, dry, and free of any contaminants.
Apply a moisture barrier: Use a manufacturer-recommended primer or moisture-blocking system to prevent moisture vapor transmission.
Eliminate air and moisture: Use a degreasing treatment to remove any oils or residues from the surface.
Apply epoxy in correct proportions: Mix the epoxy resin and hardener in the perfect ratio recommended by the manufacturer.
Choose the right roller or applicator: Use the correct tools to apply the epoxy evenly and avoid trapping air or moisture.
Properly cure the epoxy: Allow the epoxy to cure in the recommended air temperature and humidity conditions to ensure it hardens correctly.
By following these steps, you can prevent moisture and air from becoming trapped under the epoxy, resulting in a smooth and long-lasting finish. Remember to consult a professional resin flooring specialist for expert advice and installation.
Choosing the right roller or applicator is essential for a successful epoxy flooring installation. Here are some steps to consider:
Choose an applicator based on the size and type of the area you’re coating. For large areas, use a roller, and for smaller, detailed sections, use a brush.
Select the appropriate nap length for the roller, depending on the thickness of the epoxy and the desired texture.
Ensure that the roller or brush is clean and free of any debris or loose fibers that could contaminate the epoxy.
Follow the manufacturer’s instructions for proper mixing and application techniques.
Pro-tip: For larger areas, consider using a squeegee as it allows for quick and even application of the epoxy, resulting in a smoother finish.
Proper mixing and application techniques are essential for a successful epoxy flooring installation. To achieve a smooth and durable finish, follow these steps:
Pro-tip: If you are unsure about the mixing and application process, it is recommended to consult a professional resin flooring specialist for expert guidance and a flawless finish.
When it comes to maintaining the pristine condition of your epoxy flooring and preventing stains, it is important to focus on prevention. This section provides valuable tips and tricks to help you eliminate stubborn stains on your epoxy floors. From regular cleaning and maintenance to using the appropriate cleaning products and implementing protective measures, we have all the information you need. Let’s delve into the details and explore how you can keep your epoxy flooring looking flawless and free from any issues.
Regular cleaning and maintenance are essential for preserving the quality and appearance of epoxy flooring. To ensure the longevity of your epoxy floor, follow these important steps:
Using appropriate cleaning products is essential for maintaining the longevity and appearance of epoxy flooring. To ensure proper cleaning, follow these steps:
By following these protective measures, you can minimize the risk of spills and maintain the integrity of your epoxy flooring.
Epoxy flooring problems can include peeling and blistering, discoloration and fading, cracking and chipping, uneven finish, and a slippery surface.
Peeling and blistering can be caused by improper surface preparation, not using a primer, poor quality epoxy, applying epoxy in unsuitable temperatures, humidity problems, incorrect preparation of the epoxy mixture, and not allowing the epoxy to cure properly.
To prevent peeling and blistering in epoxy floors, it is important to thoroughly clean the surface, use a manufacturer-recommended primer, ensure proper surface preparation, use high-quality epoxy products, apply epoxy in suitable temperatures, address humidity issues, prepare the epoxy mixture correctly, and allow the epoxy to cure properly.
An uneven finish in epoxy flooring can be caused by improper surface preparation, improper installation, inconsistent application, or the use of low-quality epoxy products.
To avoid an uneven finish in epoxy flooring, it is important to properly prepare the surface, use professional flooring services, ensure consistent application, and choose high-quality epoxy products.
Epoxy flooring enhances safety by addressing moisture and humidity issues, implementing proper maintenance and care, and adding non-slip agents to reduce the risk of accidents.
In the realm of flooring options, epoxy flooring has gained significant recognition for not only its functional benefits but also its undeniable aesthetic appeal. Epoxy flooring is a type of surface coating made up of epoxy resin that is applied to concrete floors, transforming them into durable, visually appealing spaces. The functional benefits of epoxy flooring are worth mentioning, which include its exceptional durability and longevity, resistance to chemicals and stains, as well as easy maintenance and cleaning. However, it is the aesthetic appeal of epoxy flooring that truly sets it apart. By enhancing the visual appeal of spaces, offering customization options, providing a seamless and smooth finish, and adding reflectivity and brightness, epoxy flooring can truly transform any ordinary space into an extraordinary one. It finds applications in various settings, from residential homes to commercial and industrial facilities. Before installing epoxy flooring, considering factors such as surface preparation, cost considerations, and the installation process is crucial. By exploring the functional and aesthetic aspects of epoxy flooring, it becomes evident that this flooring option offers a perfect blend of functionality and visual appeal, making it a top choice for transforming spaces.
Epoxy flooring brings not only functionality but also a remarkable aesthetic appeal that can completely transform spaces. This section explores the functional benefits of epoxy flooring, including its durability and longevity, resistance to chemicals and stains, as well as its easy maintenance and cleaning. Discover how this versatile flooring option revolutionizes spaces with its durability, resistance, and effortless upkeep.
Durability and longevity are important considerations when selecting epoxy flooring for your space. To ensure the durability and longevity of your epoxy flooring, follow these steps:
Epoxy flooring provides excellent resistance to chemicals and stains, making it a perfect choice for various applications.
Fun Fact: Epoxy flooring has even been used in laboratories and industrial facilities where extreme chemical resistance is required.
Easy Maintenance and Cleaning
Epoxy flooring provides easy maintenance and cleaning, making it a perfect choice for residential, commercial, and industrial spaces.
Fact: With its minimal maintenance requirements, epoxy flooring saves time and effort in cleaning, allowing for hassle-free upkeep.
The Aesthetic Appeal of Epoxy Flooring
Transforming spaces into visually stunning masterpieces is the specialty of epoxy flooring. This section explores the captivating world of epoxy flooring’s aesthetic appeal. It delves into how epoxy flooring enhances the visual appeal of spaces and offers numerous customization options. Join us on a journey to discover the seamless and smooth finish, as well as the mesmerizing reflectivity and brightness that epoxy flooring brings to any environment. Prepare to be amazed by the transformative power of this exquisite flooring option.
Epoxy flooring not only offers functional benefits but also enhances the visual appeal of spaces through its various features and customization options. Let’s explore how epoxy flooring enhances the visual appeal:
With these visual enhancements, epoxy flooring has the ability to transform any space into a visually stunning and attractive area.
Customization options are an important consideration when selecting epoxy flooring. Here are some steps to help you choose the perfect customization options for your space:
Colour selection: Choose from a wide range of colours to match your aesthetic preferences or corporate branding.
Pattern options: Explore different patterns like flakes, metallic designs, or marbling effects to add visual interest and depth to your floor.
Texture variations: Consider adding texture to your epoxy floor, such as anti-slip additives or a glossy finish, for both safety and style.
Logo or design incorporation: Personalise your space by incorporating your company logo, unique designs, or custom patterns into your epoxy flooring.
Custom borders or accents: Enhance the look of your floor with custom borders or accents, creating focal points or guiding movement in a space.
Incorporating customization options in epoxy flooring can truly transform a space. For example, a restaurant in London opted for a bold, vibrant red epoxy floor with a pattern that resembled flowing wine, highlighting their passion for fine dining and creating a visually stunning atmosphere that impressed guests.
A seamless and smooth finish is one of the key benefits of epoxy flooring. This type of flooring provides a sleek and polished appearance that can instantly transform any space. Here are a few reasons why a seamless and smooth finish is highly desirable:
Enhanced aesthetics: The seamless and smooth surface of epoxy flooring creates a clean and modern look, enhancing the overall aesthetics of the space.
Easier maintenance: The lack of seams and cracks makes epoxy flooring easy to clean and maintain. The smooth surface prevents dust, dirt, and debris from getting trapped, allowing for hassle-free upkeep.
Improved safety: With no uneven surfaces or trip hazards, a seamless and smooth finish ensures a safe environment for both residents and visitors.
Fun fact: The smooth finish of epoxy flooring not only enhances the visual appeal but also contributes to a more hygienic and allergen-free environment.
Epoxy flooring provides unique benefits, such as its reflectivity and brightness, which enhance the aesthetic appeal of spaces. This characteristic is significant for several reasons:
Increased lighting: Epoxy flooring has a high gloss finish that reflects light, effectively brightening up the area.
Improved visibility: The reflective properties of epoxy flooring can help improve visibility by bouncing light off its surface, making it easier to see and navigate in poorly lit areas.
Elevated ambiance: The bright and reflective nature of epoxy flooring can create a visually appealing and inviting atmosphere in both residential and commercial spaces.
Enhanced safety: The increased brightness and improved visibility provided by epoxy flooring can contribute to a safer environment by reducing the risk of accidents and tripping hazards.
Consider these factors when selecting epoxy flooring for spaces that require an added boost of reflectivity and brightness.
Epoxy flooring has a wide range of applications that extend beyond its functionality. This section will explore the different ways epoxy flooring can transform spaces. From residential use to commercial and industrial settings, we will examine the aesthetic appeal and practicality that epoxy flooring brings to various environments. Whether you want to enhance your home’s interior or improve the durability of a commercial space, epoxy flooring offers versatile options that are worth considering.
Epoxy flooring is a versatile option for residential use, offering durability, functionality, and aesthetic appeal.
In commercial and industrial settings, epoxy flooring offers a range of benefits, making it a popular choice for these applications.
| Benefits | Examples |
| Durability and longevity | Factories, warehouses |
| Resistance to chemicals and stains | Cafeterias, laboratories |
| Easy maintenance and cleaning | Hotels, hospitals |
| Enhancing the visual appeal | Retail stores, showrooms |
One true story involves a large industrial facility that installed epoxy flooring to improve safety and productivity. The seamless and easy-to-clean surface minimized slip and trip hazards, while the resistance to chemicals protected against damage. The visually appealing flooring also contributed to a more positive and professional work environment.
Factors to Consider before Installing Epoxy Flooring. Transforming spaces with epoxy flooring requires careful consideration of several factors. From surface preparation to cost considerations and the installation process, each element plays a significant role in achieving the desired aesthetic appeal. In this section, we will explore the key factors to consider before installing epoxy flooring. We will unveil the importance of proper surface preparation, analyze cost considerations, and delve into the intricacies of the installation process. This will equip you with essential insights for making informed decisions about your flooring transformation.
To ensure a successful installation of epoxy flooring, it is crucial to properly prepare the surface. Here are the steps involved in surface preparation:
Thoroughly clean the surface by removing any dirt, debris, or existing coatings.
Repair any cracks or damages in the substrate using a suitable concrete repair compound.
Profile the surface by roughening it, either through shot blasting or diamond grinding, to improve adhesion.
Remove any moisture or contaminants using a moisture meter or moisture barrier system.
Ensure the surface is dry before applying the epoxy coating.
By following these steps, you can create a clean and well-prepared surface, allowing the epoxy flooring to adhere properly and achieve optimal performance. It is important to remember that proper surface preparation is key to a long-lasting and aesthetically pleasing epoxy flooring installation.
When considering the cost of installing epoxy flooring, it is important to take several factors into account:
Epoxy flooring has been used since the 1950s when it was first developed for industrial applications. Over the years, advancements in technology and the growing popularity of epoxy flooring have made it a cost-effective solution for both residential and commercial spaces. Today, epoxy flooring is known for its durability, versatility, and aesthetic appeal, making it a popular choice for transforming spaces.
Installing epoxy flooring involves several steps to ensure a successful and long-lasting application process.
To ensure a smooth installation process, it is recommended to hire a professional for larger projects or if you have little experience with epoxy flooring. Proper preparation, application, and curing are crucial for a durable and visually appealing epoxy floor.
Remember to follow safety guidelines, wear protective gear, and work in a well-ventilated area during the installation process.
Epoxy flooring offers more than just functional benefits. It adds sophistication, elegance, and a sense of luxury to any space. The seamless and glossy finish creates a visually striking impression, transforming the ambiance and creating a statement of sophistication. With a vast palette of colors, patterns, and textures, epoxy flooring allows for customizable designs that seamlessly blend aesthetics with durability.
There are five key resin flooring technologies suitable for commercial establishments: epoxy, polyurethane, PU concrete, PU comfort flooring, and methyl-methacrylate (MMA). Each technology offers unique properties and can be customized to meet specific design requirements. From the versatility and robustness of epoxy to the flexibility and durability of polyurethane, these resin flooring systems provide long-lasting protection and eye-catching aesthetics.
Epoxy flooring is a two-component system that transforms from a liquid state to a solid surface through a chemical reaction. This process creates a seamless and robust structure that can withstand heavy traffic, impact, and environmental stresses. The excellent adhesion properties of epoxy allow it to bond strongly to the substrate, providing a durable and long-lasting flooring solution.
Epoxy flooring offers a wide range of design options, including a vast palette of colors, patterns, and finishes. It can be combined with decorative elements to add texture and visual interest to the floor. With epoxy, individuals can express their unique style and create spaces that exude refinement and a sense of luxury.
Resin flooring has the power to transform the ambiance of luxury hotels and resorts by creating a lasting impression on guests. With its seamless finishes, customizable designs, and a wide range of colors and patterns, resin flooring can create an enchanting atmosphere that shapes guests’ entire experience. The fusion of beauty and durability in resin flooring systems sets the stage for a world of hospitality and ensures that first impressions carry tremendous weight.
Resin flooring systems, such as epoxy and polyurethane, offer long-lasting protection in industrial projects due to their resistance to chemicals, abrasion, impact, and environmental stresses. These specialized formulations can withstand exposure to cleaning agents, solvents, and other harsh substances commonly found in industrial environments. By providing a durable and easy-to-maintain surface, resin flooring ensures the longevity and safety of industrial spaces.
Step into Perfection: A Comprehensive Guide to Installing Your Epoxy Floor
Benefits of Installing an Epoxy Floor
Installing an epoxy floor offers a range of benefits that make it a popular choice for both residential and commercial spaces. These benefits include:
Preparing Your Floor for Epoxy Installation
Before installing an epoxy floor, proper preparation of the existing floor is crucial. This ensures a strong bond and a successful installation. The preparation process involves several steps, including:
Choosing the Right Epoxy System
There are different types of epoxy systems available, and choosing the right one depends on your specific needs and requirements. The three main types of epoxy systems are:
Tools and Materials Needed for Installation
To install an epoxy floor, you will need specific tools and materials. These include epoxy resin, hardener, primer, paint roller, mixing paddle, squeegee, masking tape, and safety equipment such as gloves and goggles.
Step-by-Step Guide to Installing Your Epoxy Floor
Follow these steps to ensure a successful epoxy floor installation:
Post-Installation Care and Maintenance
To ensure the longevity of your epoxy floor, it is important to follow proper care and maintenance practices. This includes regular cleaning, avoiding harsh chemicals, and promptly addressing any spills or stains that may occur.
Troubleshooting Common Issues
While epoxy floors are highly durable, some common issues may arise, such as air bubbles, uneven coating, or color inconsistencies. This section will provide troubleshooting tips to help address these issues effectively.
By following this comprehensive guide, you can confidently install your epoxy floor and enjoy its numerous benefits for years to come.
Installing an epoxy floor has numerous benefits that make it a popular choice among homeowners. Its remarkable durability and longevity, as well as its versatile design, provide the perfect combination of functionality and aesthetics. Additionally, the ease of maintenance and cleaning, along with its excellent resistance to chemicals and stains, further enhance its appeal. Let’s explore the many advantages of installing an epoxy floor and understand why it is the epitome of perfection for your space.
Durability and longevity are important factors to consider when selecting an epoxy floor. Here are some key points to keep in mind:
To ensure the durability and longevity of your epoxy floor, it is important to follow proper installation and maintenance guidelines. Regular cleaning, avoiding harsh chemicals, and promptly addressing any repairs or damages will help extend its lifespan.
Consider selecting a professional contractor with experience in epoxy floor installation to achieve the best results. By following these tips, you can maximize the benefits of your investment in an epoxy floor.
When it comes to epoxy floors, one of the key benefits is their versatility in design. Here are some ways in which epoxy floors can be customised to suit various design preferences:
These design options make epoxy floors a versatile choice for any area, whether it’s a residential, commercial, or industrial space.
Easy maintenance and cleaning are key benefits of installing an epoxy floor. There are several reasons why this is the case:
Epoxy floors offer excellent chemical and stain resistance, making them ideal for various applications. Here is a table outlining the resistance properties of epoxy floors:
| Chemical | Resistant |
| Acids | Yes |
| Oils | Yes |
| Solvents | Yes |
| Grease | Yes |
| Stains | Yes |
Epoxy floors form a seamless, impermeable surface that prevents corrosive substances from seeping into the substrate. This chemical and stain resistance ensures the longevity and durability of the floor, making it an excellent choice for industrial, commercial, and residential spaces.
Embarking on an epoxy floor installation journey? Let’s start by giving your floor the attention it deserves. This section will delve into the necessary steps to ensure a flawless epoxy installation. From assessing the floor’s current condition to repairing cracks and imperfections, and finally, thoroughly cleaning the surface – we’ve got you covered. Prepare to lay the groundwork for a stunning and durable epoxy floor transformation.
Assessing the condition of the floor is an important initial step in the installation of an epoxy floor. The following steps should be followed:
|
Fact: A properly assessed and prepared floor surface is crucial for achieving a seamless and long-lasting epoxy floor installation.
Repairing cracks and imperfections is essential before installing an epoxy floor to achieve a smooth and durable finish. To properly prepare your floor, follow these steps:
By following these steps, you can ensure that your epoxy floor will have a seamless and flawless appearance. Always read and follow the manufacturer’s instructions for the specific epoxy product you are using. Regular maintenance and cleaning will also help extend the lifespan of your epoxy flooring.
Properly cleaning the floor surface is essential before installing an epoxy floor. Follow these steps to ensure a clean and smooth surface for the epoxy coating:
By properly cleaning the floor surface, you ensure optimal adhesion of the epoxy coating and a long-lasting, beautiful finish.
Choosing the Right Epoxy System
When installing an epoxy floor, it is important to choose the appropriate epoxy system. This section will explore various options to assist you in making an informed decision. We will discuss the characteristics and advantages of solvent-based epoxy, water-based epoxy, and 100% solid epoxy. Prepare yourself to find the ideal epoxy system for your flooring requirements, guaranteeing a flawless and durable finish.
Solvent-based epoxy is a popular choice for flooring installations in the UK due to its durability and chemical resistance. It consists of a mixture of epoxy resin and a solvent, which provides better penetration into the concrete substrate. Here is a breakdown of the main characteristics of solvent-based epoxy:
A solvent-based epoxy floor requires proper ventilation during installation due to the release of volatile organic compounds (VOCs). It is essential to follow safety guidelines and wear appropriate personal protective equipment.
Solvent-based epoxy offers exceptional durability and chemical resistance for flooring applications in the UK, making it a reliable choice for commercial and industrial spaces. Remember to consider the specific needs of your project before selecting the epoxy system.
Water-based epoxy is a popular choice for flooring installations due to its ease of use and environmentally friendly properties. It is a type of epoxy that uses water as a carrier instead of solvents or other chemicals.
Here is a table outlining the benefits and considerations of using water-based epoxy:
| Benefits | Considerations |
| Low VOC emissions | Longer curing time compared to solvent-based epoxy |
| Non-toxic and odourless | Less resistant to chemicals and stains |
| Environmentally friendly | May require more coats for desired thickness and durability |
| Easy to clean up with water | Can be more expensive than solvent-based epoxy |
Considering the attributes of water-based epoxy can help you make an informed decision when choosing the right flooring system for your needs. If you prioritise environmental friendliness, low VOC emissions, and easy cleanup, water-based epoxy may be the ideal choice for your project.
Remember to consult with professionals and follow the manufacturer’s guidelines for the best results in installing and maintaining your epoxy floor.
100% Solid Epoxy is a high-performance flooring option known for its durability and strength. This type of epoxy is made up of 100% solid content, with no solvents or water added. It provides excellent chemical and abrasion resistance, making it ideal for areas with heavy traffic or exposure to chemicals. 100% Solid Epoxy offers a seamless and smooth surface, making it easy to clean and maintain. It is commonly used in industrial settings, commercial buildings, and garages. When installing a 100% Solid Epoxy floor, proper surface preparation and application techniques are essential to ensure a successful and long-lasting installation.
Pro-Tip: Consider consulting a professional for the installation of a 100% Solid Epoxy floor to ensure optimal results.
To ensure a successful installation of your epoxy floor, it is crucial to have the correct tools and materials. Here is a list of the essential items you will need:
Having these tools and materials ready will ensure a smooth installation process and result in a high-quality epoxy floor.
Get ready to transform your space with an awe-inspiring epoxy floor installation! This guide will take you through each stage of the process in a step-by-step manner. From meticulous floor preparation to the application of the final topcoat, we’ll cover it all. You’ll learn the secrets to achieving a flawless epoxy finish and how to incorporate stunning decorative elements into your floor design. So, roll up your sleeves and let’s dive into the world of epoxy flooring perfection!
Preparing your floor for epoxy installation is an essential step in achieving a successful outcome. The following are the key steps to consider for floor preparation:
By following these steps, you can ensure that your floor is adequately prepared for the application of the epoxy, resulting in a durable and long-lasting finish.
To achieve a successful epoxy floor installation, it is crucial to properly apply the primer. Follow these steps for a smooth and durable finish:
| Steps | Description |
|---|---|
| 1 |
Thoroughly clean the floor surface, removing any dirt, dust, or debris. |
| 2 |
Repair any cracks, imperfections, or damage on the floor before applying the primer. |
| 3 |
Select a high-quality epoxy primer that is compatible with your specific floor type. |
| 4 |
Follow the manufacturer’s instructions to mix the primer and achieve the correct consistency. |
| 5 |
Apply the primer evenly using a roller or brush, working in small sections. |
| 6 |
Allow the primer to dry completely before proceeding with the epoxy coating. |
By following these steps, you can ensure that the primer effectively bonds to the floor surface, creating a strong foundation for the epoxy coating.
When it comes to mixing and applying the epoxy coating for your floor, it is important to follow the correct steps to ensure a successful installation. Here is a step-by-step guide to help you:
Prepare the epoxy mixture according to the manufacturer’s instructions, ensuring that you carefully measure and mix the components.
Start applying the epoxy coating using a roller or brush, beginning from the furthest corner of the room and working your way towards the exit.
Apply the epoxy in thin, even coats, making sure to avoid puddles or excessive buildup.
Use a squeegee or roller to spread the epoxy evenly across the floor, ensuring complete coverage.
Allow the first coat to dry as per the manufacturer’s instructions before applying additional coats.
For a more durable finish, consider adding a clear topcoat once the final epoxy coat has dried.
By following these steps, you will be able to achieve a smooth and professional-looking epoxy floor coating.
To enhance the appearance and customize your epoxy floor, there are several options available for adding decorative elements. Here are a few ideas:
1. Metallic pigments: Incorporate metallic pigments into the epoxy coating to add shimmer and depth to your floor. This can create a stunning metallic effect that changes with the lighting.
2. Flakes or chips: Sprinkle decorative flakes or chips onto the wet epoxy surface to create a speckled or textured design. These flakes come in various colours and sizes, offering endless design possibilities.
3. Stencils or tape: Use stencils or tape to create patterns or designs on the epoxy floor. Layering different colours or utilising techniques like marbling or geometric shapes can achieve a unique and artistic look.
4. Custom logos or images: For a more personalised touch, consider adding custom logos or images to your epoxy floor. These can be applied using stencils, decals, or by working with a professional artist.
Adding decorative elements to your epoxy floor not only enhances its visual appeal but also allows you to create a space that reflects your style and personality.
Fact: Did you know that epoxy floors are not limited to residential and commercial spaces? They are also commonly used in industrial settings due to their durability, chemical resistance, and easy maintenance.
When applying the topcoat to your epoxy floor, follow these steps for a professional and long-lasting finish:
Fact: A proper topcoat application not only enhances the appearance of your epoxy floor but also adds an extra layer of protection, increasing the floor’s durability and resistance to wear and tear.
Implementing proper post-installation care and maintenance is essential to maintain the longevity and appearance of your epoxy floor. Here are the steps you should follow:
Regular Cleaning: Sweep or vacuum the floor to remove dust and debris.
Gentle Washing: Use a mild detergent and warm water to mop the floor. Avoid using harsh chemicals that can damage the epoxy.
Stain Prevention: Immediately wipe spills to prevent stains. Consider using mats or rugs in high-traffic areas to reduce wear and tear.
Protection from Scratches: Place furniture pads under heavy objects to prevent scratches. Avoid dragging heavy items across the floor.
Regular Inspections: Check for any signs of damage or wear and promptly address them by contacting a professional.
Reapply Topcoat: Over time, the epoxy floor may require a new topcoat to maintain its shine and durability.
By following these steps, you can ensure that your epoxy floor remains in excellent condition for years to come, extending its lifespan and preserving its aesthetic appeal.
Pro-tip: If you encounter any issues during the installation process, it is recommended to seek guidance and assistance from a professional. Troubleshooting common issues can help you achieve a flawless epoxy floor installation.
A roller applied floor refers to applying epoxy floor paint using a roller, which is suitable for light wear and tear. On the other hand, a self-leveling epoxy floor refers to a thicker floor coating that is more suitable for heavier industrial use.
The common methods for surface preparation include grinding, sanding, shot-blasting, and milling. Diamond grinding is the most popular and flexible method as it allows for the use of different types of grinding tools.
Yes, priming is necessary before applying epoxy floor paint. Priming creates a surface for proper bonding, improves adhesion, extends floor life, and reduces the risk of bubbles and gasses in the final epoxy coat.
Before applying epoxy floor paint, all cracks, holes, and dents should be filled with epoxy grout. Large and deep holes may require filling with fast-drying cement mortar before applying the primer.
Yes, smaller cracks and holes can be patched either before or after applying the primer for epoxy floor paint. It is common for cracks to become visible after applying the primer.
No, no special tools are required for installing Everlast® Epoxy Flooring. However, having a clean 5-gallon bucket, Xylene for cleaning tools, a steel finishing trowel, a cove base tool, a gauge trowel, a mixing drill, and safety equipment such as gloves, goggles, kneepads, and dust masks is recommended.
Mastering the Art of Resin Flooring: A Comprehensive Guide
Resin flooring is a popular choice for both residential and commercial spaces due to its durability, versatility, and aesthetic appeal. This comprehensive guide aims to provide a thorough understanding of resin flooring, including its different types, advantages, installation process, maintenance, and troubleshooting.
Understanding Different Types of Resin Flooring
Resin flooring encompasses a range of materials, each with its own unique properties and characteristics. This guide will delve into the following types of resin flooring: Epoxy Resin Flooring, Polyurethane Resin Flooring, Methyl Methacrylate (MMA) Resin Flooring, and Acrylic Resin Flooring. By exploring the distinct features of each type, you can make an informed decision based on your specific requirements and preferences.
Advantages and Benefits of Resin Flooring
Resin flooring offers numerous benefits that make it an attractive option for various applications. These advantages include exceptional durability, resistance to chemicals and moisture, easy maintenance, and a wide range of design options. Understanding the benefits of resin flooring can help you determine if it is the right choice for your space.
Factors to Consider Before Installing Resin Flooring
Before embarking on a resin flooring project, there are certain factors that need to be taken into consideration. These factors include substrate preparation, traffic and usage requirements, chemical and moisture resistance, and the desired anti-slip properties. By addressing these considerations beforehand, you can ensure that your resin flooring installation meets your specific needs.
Installation Process for Resin Flooring
A proper installation process is crucial for achieving a flawless resin flooring finish. This guide will take you through the step-by-step installation process, including surface preparation, priming, mixing and application of the resin, and the application of topcoat and sealant. Following these guidelines will help you achieve a high-quality and long-lasting resin flooring system.
Maintenance and Cleaning Tips for Resin Flooring
To preserve the longevity and appearance of your resin flooring, proper maintenance and cleaning are essential. This section will provide you with valuable tips and techniques for routine cleaning, stain removal, and preventative maintenance. By implementing these practices, you can keep your resin flooring looking pristine for years to come.
Common Issues and Troubleshooting
Despite its durability, resin flooring may encounter certain issues over time. This guide will address common problems such as cracking, peeling, discolouration, and unevenness, along with troubleshooting techniques to resolve these issues effectively. Understanding how to identify and rectify these problems will help you maintain the integrity and aesthetics of your resin flooring.
By mastering the art of resin flooring through this comprehensive guide, you will be equipped with the knowledge and skills necessary to make informed decisions, achieve successful installations, and ensure the long-term performance and beauty of your resin flooring.
When it comes to understanding different types of resin flooring, it is important to explore the various options available. This section will discuss epoxy resin flooring, polyurethane resin flooring, methyl methacrylate resin flooring, and acrylic resin flooring. Each sub-section will provide information on the distinct characteristics, applications, and benefits of these resin flooring types. Prepare to delve into the captivating world of resin flooring and enhance your knowledge on this crucial aspect of interior design and construction.
Epoxy resin flooring is a popular choice for many commercial and industrial spaces due to its durability and chemical resistance. Here is a table outlining some key features of epoxy resin flooring:
| Feature | Description |
| Durability | Epoxy resin flooring is highly durable and can withstand heavy foot traffic and machinery. |
| Chemical Resistance | It has excellent resistance to a wide range of chemicals, making it suitable for areas where spills and chemical exposure are common. |
| Seamless Finish | Epoxy resin flooring creates a smooth and seamless surface, eliminating cracks and joints where dirt and bacteria can accumulate. |
| Customisation | It can be customised with different colours, patterns, and textures to create a visually appealing floor. |
| Easy Maintenance | Epoxy resin flooring is easy to clean and maintain, requiring minimal effort to keep it in good condition. |
When considering epoxy resin flooring for your space, ensure that proper surface preparation is done and that it meets your specific needs in terms of traffic, chemical resistance, moisture resistance, and anti-slip properties. Consulting with a professional in resin flooring installation is recommended to ensure a successful and long-lasting result.
Epoxy resin flooring offers numerous benefits and advantages, making it a reliable and practical choice for commercial and industrial spaces. Consider its durability, chemical resistance, seamless finish, customisation options, and easy maintenance when selecting flooring for your space. Consulting with professionals will ensure that you make the right choice for your specific needs.
Polyurethane resin flooring is a popular choice for many commercial and industrial spaces due to its durability and resistance to chemicals, abrasions, and impact. Here are some key points to consider when it comes to polyurethane resin flooring:
A manufacturing plant in the UK installed polyurethane resin flooring in their production area. Not only did it withstand heavy equipment and foot traffic, but it also provided excellent chemical resistance against the harsh substances used in their processes. The seamless and easy-to-clean surface made maintenance a breeze, contributing to a clean and hygienic workspace for their employees. The polyurethane resin flooring proved to be a durable and cost-effective solution for their industrial needs.
Methyl Methacrylate (MMA) resin flooring is a type of resin flooring that offers fast curing times and high chemical resistance. It is commonly used in environments that require a quick turnaround, such as commercial kitchens and hospitals.[1] MMA resin flooring is known for its durability and ability to withstand heavy traffic.[2] It is also resistant to staining and easy to clean, making it a popular choice for areas that require strict hygiene standards.[3] A true example of the effectiveness of MMA resin flooring is its use in a busy restaurant kitchen, where it was able to withstand constant spills and foot traffic without showing any signs of wear and tear.[4]
Acrylic resin flooring is a popular choice for various commercial and industrial applications due to its durability, versatility, and aesthetic appeal. Here are some key points to consider when it comes to acrylic resin flooring:
Resin flooring offers numerous advantages and benefits that make it a popular choice for both residential and commercial spaces.
Historically, resin flooring dates back to ancient Egypt, where it was commonly used in the construction of temples and palaces. The Egyptians recognised the durability and aesthetic appeal of resin flooring, showcasing their advanced knowledge of materials and design. Today, resin flooring continues to evolve and improve, becoming an innovative solution for modern spaces.
When it comes to resin flooring, there are important factors to consider before installation. These factors include substrate preparation, chemical resistance, moisture resistance, and anti-slip properties. Understanding these elements will help you make informed choices for your flooring needs. Let’s explore the essential factors you need to evaluate before installing resin flooring.
Substrate preparation is an important step in the installation of resin flooring. It ensures proper adhesion and a long-lasting finish. Here is a list of steps involved in substrate preparation:
Clean the surface thoroughly by removing any dirt, dust, grease, or contaminants.
Repair any cracks, holes, or uneven areas on the substrate using appropriate patching materials.
Level the surface by grinding or shot blasting to create a rough texture for better adhesion.
Etch the substrate with an acid wash or mechanical abrasion to promote bonding.
Remove any excess moisture or moisture barriers that could affect the performance of the resin flooring.
Prime the surface with a suitable primer to enhance adhesion and prevent moisture penetration.
Substrate preparation has been a vital part of flooring installation for centuries. Ancient civilizations used techniques like pounding clay or sand to create a smooth and even surface before applying their floor finishes. Over time, advancements in materials and technology have led to more efficient and effective methods of substrate preparation, ensuring durable and beautiful resin flooring installations.
When considering resin flooring, it is important to take into account the specific traffic and usage requirements of the space. This will ensure that the chosen resin flooring system is durable and able to withstand the demands of the environment.
When considering resin flooring, it is important to take into account the specific traffic and usage requirements of the space. This will ensure that the chosen resin flooring system is durable and able to withstand the demands of the environment.
Chemical resistance is an important consideration when selecting resin flooring. It determines the floor’s ability to withstand exposure to different chemicals without deteriorating. Here is a table that displays the chemical resistance of various types of resin flooring:
| Resin Flooring Type | Chemical Resistance |
| Epoxy Resin Flooring | High resistance to most chemicals, including acids and solvents. |
| Polyurethane Resin Flooring | Excellent resistance to oils, greases, and chemicals. |
| Methyl Methacrylate Resin Flooring | Good resistance to chemicals, including acids and alkalis. |
| Acrylic Resin Flooring | Moderate resistance to some chemicals. |
Fact: Epoxy resin flooring is well-known for its exceptional chemical resistance, making it a popular choice for industrial and commercial settings.
By considering these factors, you can select and install a resin flooring system that effectively resists moisture and avoids potential issues in the future.
Anti-slip properties are an important factor to consider when selecting resin flooring. Here are some key points to keep in mind:
Installing resin flooring is a crucial process that requires careful attention to detail. In this section, we will guide you through the essential steps and techniques involved in the installation process. This includes thorough surface preparation, precise resin application, and achieving a flawless finish through topcoat and sealant application. By mastering the art of resin flooring, you can transform your space into something truly stunning.
Surface preparation is an essential step in the installation of resin flooring. It ensures proper adhesion and the longevity of the flooring system. The following steps are involved in surface preparation:
Priming is a crucial step in the installation process of resin flooring. It involves applying a primer coat to the substrate before the resin is applied.
Priming serves several purposes:
To achieve proper priming, the substrate should be clean, dry, and free from any contaminants. The primer should be applied evenly using a roller or brush and allowed to cure according to the manufacturer’s instructions before proceeding with the application of the resin.
Proper priming is crucial for a successful resin flooring installation, as it promotes durability and enhances the overall performance of the floor.
The mixing and application of resin is a crucial step in the installation process of resin flooring. Here are the steps involved in this process:
Surface Preparation: Ensure that the substrate is clean, dry, and free from any contaminants.
Priming: Apply a suitable primer to enhance adhesion between the substrate and the resin.
Mixing: Follow the manufacturer’s instructions and mix the resin components thoroughly to achieve a homogeneous mixture.
Application: Use a trowel or roller to apply the resin onto the prepared surface evenly.
Topcoat and Sealant Application: Apply a topcoat to protect the resin and enhance its durability. Apply a sealant to promote resistance against chemicals and moisture.
By following these steps correctly, you can ensure a proper mixing and application process for resin flooring.
Applying a topcoat and sealant is a crucial step in the installation process of resin flooring. It helps protect the surface from wear and tear, chemicals, and moisture, ensuring longevity and durability. Here are the steps involved in topcoat and sealant application:
A company specialising in industrial floor coatings applied a topcoat and sealant to a warehouse floor. Despite the high volume of foot and vehicle traffic, the floor remained in excellent condition for years, thanks to the proper application of the topcoat and sealant. This not only saved the company money on repairs and replacement but also ensured a safe and durable working environment for their employees.
Maintenance and Cleaning Tips for Resin Flooring
To ensure that your resin flooring remains in top condition, it is crucial to perform regular maintenance and cleaning. By following these tips, you can keep your resin floors looking pristine:
Pro-tip: To prevent scratches and damage, refrain from dragging heavy furniture or sharp objects across the resin floor. By consistently maintaining and properly caring for your resin flooring, you can extend its lifespan.
Resin flooring can experience common issues that require troubleshooting in order to achieve a flawless finish. Here are some potential problems and their solutions:
The 3-day training course for mastering resin flooring lasts for a duration of three days.
No, previous experience is not required for the fast-paced 1-day course on expert techniques for creating stunning epoxy countertops.
You can cancel contracts related to resin flooring by using the provided option to terminate contracts.
High-quality work in resin flooring is guaranteed by following the guidelines and security measures provided.
The Wizard, with over 7 years of experience and numerous completed projects, is considered the best in the industry for resin flooring.
The 3-day training course provides a comprehensive understanding of epoxy flooring and the opportunity to learn directly from the industry’s best, the Wizard.
Mastering the art of laying resin flooring requires a comprehensive understanding of its characteristics and proper installation techniques. Resin flooring is a popular choice for commercial and residential spaces due to its durability, easy maintenance, chemical resistance, and visual appeal.
Resin flooring is a type of flooring system made from a combination of liquid resin and hardener that, when mixed together, create a strong and seamless surface. It provides a smooth and glossy finish that is highly resistant to wear and tear, making it suitable for high traffic areas.
There are various types of resin flooring available, including epoxy, polyurethane, and methyl methacrylate (MMA) resin. Each type offers unique features and benefits, such as enhanced chemical resistance or rapid curing times, catering to different application requirements.
The benefits of resin flooring are numerous and contribute to its popularity. Its exceptional durability and longevity ensure that it can withstand heavy foot traffic, impacts, and abrasions without losing its aesthetic appeal. Maintenance is hassle-free, with simple cleaning procedures that keep the floor looking pristine. Resin flooring is highly resistant to chemicals, making it suitable for industrial settings where spillages may occur. Its smooth and seamless finish adds a touch of elegance to any space.
Before embarking on the installation process, several factors need to be considered. Proper surface preparation, including cleaning and leveling, is essential to achieve a smooth and even base. The choice of resin type should be based on the specific requirements of the space, considering factors such as the environment, desired appearance, and level of durability needed. Budget and time constraints should be taken into account to ensure a successful and timely installation.
By following a step-by-step guide, you can achieve a flawless resin flooring installation. Surface preparation involves cleaning, repairing, and ensuring proper adhesion. Priming the surface creates a bond between the substrate and the resin. Mixing and applying the resin properly is crucial for a smooth and even finish. For added visual appeal, decorative elements can be incorporated into the resin. A top coat application provides additional protection and durability. Finally, curing and drying the floor ensures that it reaches its optimum strength and integrity.
To maintain the longevity and appearance of resin flooring, regular cleaning using suitable methods is important. Preventative measures should be taken to avoid damage, such as using protective mats or floor coatings in high-wear areas.
For further resources and information, refer to industry-specific guides and consult with flooring professionals to ensure the successful installation and long-term care of resin flooring.
Resin flooring is a type of seamless flooring that is created by combining different materials, such as epoxy or polyurethane, with a hardener. It is known for its durability, chemical resistance, and easy maintenance. Familiarise yourself with the different types of resin flooring, such as epoxy, polyurethane, or methyl methacrylate, to choose the right option for your specific needs. Learn about the preparation and installation process, including surface preparation, mixing ratios, and application techniques, to ensure a successful resin flooring installation.
Resin flooring is a flooring system composed of multiple layers of resin materials or polymers. It provides a durable and long-lasting surface that is resistant to chemicals, impact, and wear. Resin flooring is commonly used in commercial and industrial settings due to its ability to withstand heavy foot traffic and equipment. It also offers a visually appealing finish, with various designs and decorative elements that can be incorporated. Before installing resin flooring, factors such as surface preparation, the right type of resin, application environment, and budget constraints should be considered. Proper maintenance and cleaning methods are crucial to ensure the longevity of resin flooring.
The following section discusses the different types of resin flooring available, each offering unique characteristics and benefits.
Discover the numerous advantages of resin flooring that can significantly enhance your space. Resin flooring is known for its exceptional durability, long-lasting properties, and resistance to chemicals, making it an appealing choice. Additionally, it requires minimal effort to maintain. Furthermore, the visual appeal of resin flooring is unmatched, as it can transform plain floors into stunning works of art. Prepare to delve into the realm of resin flooring and discover its incredible benefits for your home or business.
Durability and longevity are important factors to consider when choosing resin flooring. It is crucial to select high-quality resin products that are designed for durability and can withstand heavy foot traffic and other wear and tear. Additionally, proper installation by experienced professionals is essential to maximize the longevity of the resin flooring.
Regular maintenance is also key in keeping the flooring in optimal condition. Following a regular cleaning and maintenance routine will help extend the lifespan of the flooring. Implementing preventive measures such as using mats or rugs in high-traffic areas can also minimize wear and tear.
Furthermore, it is important to consider the specific environment where the resin flooring will be installed. Factors such as temperature and humidity levels can impact the durability of the flooring. Taking these environmental factors into account will help ensure the longevity of the resin flooring.
In fact, resin flooring is known for its exceptional durability and can last up to 20 years or more with proper care and maintenance. So, by considering durability and longevity, you can make an informed decision when choosing resin flooring for your space.
Easy maintenance is one of the main advantages of resin flooring. Resin floors can maintain their beauty and durability for a long time with proper care and cleaning. Here are some tips for easy maintenance of resin flooring:
By following these simple maintenance practices, you can ensure that your resin floor remains in optimal condition for years to come.
| Type of Resin Flooring | Chemical Resistance |
| Epoxy Flooring | Excellent resistance to oils, solvents, and chemicals |
| Polyurethane Flooring | High resistance to acids, alkalis, and other chemicals |
| Methyl Methacrylate (MMA) Flooring | Excellent resistance to harsh chemicals, including acids and solvents |
Considering the specific chemical environment in your facility will help determine the most suitable resin flooring to ensure long-lasting durability and protection against corrosion or damage.
To enhance the visual appeal of resin flooring, there are several factors to consider:
Before installing resin flooring, it is important to consider several factors. These factors include surface preparation, resin type selection, application environment, budget limitations, and time constraints. Each decision made in these areas can greatly affect the outcome of the project. In this section, we will discuss these considerations in detail to help you make informed choices. Let’s begin your journey to mastering the art of laying resin flooring!
To ensure a successful installation of resin flooring, it is crucial to properly prepare the surface. Follow these steps to effectively prepare the surface:
Fact: Adequate surface preparation is vital for the longevity and performance of the resin flooring system.
Choosing the correct type of resin is essential to achieve the desired outcomes in resin flooring. When making your decision, you should consider the following factors:
Pro-tip: Seek advice from a professional resin flooring contractor who can evaluate your specific requirements and recommend the most suitable resin type for your project.
In the context of resin flooring, it is important to consider the application environment. Several factors should be taken into account:
1. Temperature: It is crucial to ensure that the temperature of the application environment falls within the recommended range for the resin flooring product. Extreme temperatures can have a negative impact on the curing process and overall performance of the flooring.
2. Humidity: High humidity levels can affect the drying time of the resin and may lead to issues such as bubbling or improper adhesion. It is necessary to control humidity levels during the installation process.
3. Substrate Condition: The condition of the substrate where the resin flooring will be installed is of utmost importance. It should be clean, dry, and free from any contaminants that could interfere with the adhesion of the resin.
4. Traffic and Usage: Consider the level of traffic and usage that the flooring will be subjected to. Different types of resin flooring offer varying resistance to abrasion, impact, and chemical exposure. It is essential to choose a product that is suitable for the specific application environment.
Considering budget and time constraints is crucial when installing resin flooring. Here is a breakdown of the factors to consider:
| Factors | Description |
| Surface Preparation | Properly preparing the surface can impact the cost and time required for installation. |
| Choosing the Right Type of Resin | Selecting a resin that fits within your budget and meets the desired project timeline is essential. |
| Application Environment | Consider the working conditions and climate, as they may affect the installation process and time needed for curing. |
| Budget and Time Constraints | Ensure that the chosen resin flooring option aligns with your available budget and time frame. |
Get ready to give your floors a stunning resin finish! This guide provides a step-by-step walkthrough of the installation process for resin flooring. From surface preparation to resin mixing and application, incorporating decorative elements, applying the top coat, and finally curing and drying – all aspects are covered. Say goodbye to dull floors and welcome a sleek and long-lasting resin masterpiece!
To ensure a successful installation of resin flooring, it is crucial to properly prepare the surface. Follow these steps for effective surface preparation:
By following these steps, you can create a clean and level surface ready for the application of resin flooring. Remember, proper surface preparation is essential for a long-lasting and visually appealing result.
A company was renovating their office space and decided to install resin flooring. They neglected to properly prepare the surface, resulting in an uneven and bumpy floor. This not only affected the aesthetics but also caused safety hazards. They had to redo the entire installation, emphasizing the importance of step 1: surface preparation. Don’t make the same mistake – always ensure proper surface preparation for a successful resin flooring installation.
Before applying resin flooring, the second step is to prime the surface properly to ensure proper adhesion and a smooth finish. Here is a step-by-step guide to priming the surface:
By priming the surface properly, you create a strong foundation for the resin flooring, ensuring its long-lasting durability and performance.
Mixing and applying the resin is a crucial step in installing resin flooring. Here is a step-by-step guide to help you through this process:
Remember to wear protective gear like gloves and goggles during the mixing and application process. Following these steps will help you achieve a professional and durable resin flooring.
If you’re unsure about any step or need additional guidance, it’s recommended to consult a professional or refer to comprehensive installation guides.
Adding decorative elements to resin flooring can enhance its visual appeal and create a unique and personalized space. Here is a step-by-step guide on how to add decorative elements to resin flooring:
Fact: Adding decorative elements to resin flooring not only enhances its aesthetics but also provides a durable and easy-to-maintain surface for various applications.
The top coat application is an essential step in the installation of resin flooring. It plays a significant role in enhancing the durability and longevity of the flooring. Below are the steps involved in the top coat application:
After the application of resin flooring, the next important step is curing and drying. This step plays a crucial role in ensuring the durability and longevity of the flooring. To achieve the desired result, follow these steps for proper curing and drying:
Allow sufficient time: It is important to give the resin enough time to cure and dry completely. The duration may vary depending on the type of resin used, but typically it takes around 24-48 hours.
Control temperature and humidity: Maintain the recommended temperature and humidity levels in the area where the flooring is curing. This will ensure proper curing without compromising the integrity of the resin.
Avoid foot traffic: During the curing and drying process, it is advisable to avoid walking on the floor or placing heavy objects on it. This will prevent any potential damage or imprints on the surface.
Provide adequate ventilation: Good airflow is essential for the drying process. Make use of fans or open windows to promote air circulation.
Protect from moisture: If possible, avoid any contact with water or moisture until the flooring is fully cured and dried. This will prevent any potential damage or discoloration.
By following these steps, you can ensure that your resin flooring cures and dries properly, resulting in a strong and visually appealing finish.
Resin flooring requires regular maintenance and care to ensure its longevity and pristine appearance. In this section, we will delve into the various cleaning methods that will help keep your floor spotless and discuss effective strategies for preventing damage. Prepare yourself to uncover the secrets of maintaining flawless resin flooring for years to come!
To maintain the longevity and appearance of your resin flooring, it is crucial to prevent any damage. Here are some steps you can take to protect your resin flooring:
By following these preventive measures, you can ensure that your resin flooring remains in excellent condition and can withstand daily wear and tear.
Additional resources can be helpful in mastering the art of laying resin flooring. Below are some valuable sources that can enhance your knowledge and skills:
To terminate contracts with YouTube, you need to review the terms of use provided by YouTube. The terms of use will outline the specific steps and procedures for terminating contracts. It is important to carefully read and follow the instructions provided to ensure a smooth contract termination process.
Testing new features on YouTube typically involves a phased approach. First, YouTube identifies a group of users to participate in the testing phase. These selected users can access and try out the new features. Through their feedback and usage data, YouTube gathers insights to evaluate the performance and user experience of the new features before implementing them for all users.
YouTube’s terms of use cover various aspects such as user responsibilities, content copyright, privacy policies, security measures, and prohibited activities. It is important to familiarize yourself with these terms to ensure compliance and to understand your rights and obligations when using the YouTube platform.
YouTube is an online video-sharing platform that allows users to upload, view, and share videos. Users can create their own channels, subscribe to other channels, and interact with the YouTube community through comments, likes, and shares. YouTube also provides monetization options for content creators and serves ads to generate revenue.
Terms of use on YouTube serve as a legally binding agreement between users and the platform. They establish the rules for using YouTube’s services and define the rights and responsibilities of both users and YouTube. Adhering to the terms of use is crucial to maintain a fair and safe environment for all users.
In 2023, the copyright for YouTube belongs to Google LLC. Google LLC is the parent company of YouTube and holds the rights to the platform and its associated intellectual property.
We Aim To Reply To All Enquiries With-in 24-Hours